Dewesoft NET Setup
The NET system is always connected via Ethernet protocol. This can be done in several different ways:
- Point to point - easiest and simplest. On both sides, there is a computer (S-box, Minitaur, PC, laptop,…) with or without a measurement device (DEWE-43, Sirius, …) and an Ethernet cable between the two sides. You will have to manually set IP addresses on both sides.
- Router
- Local Area Network/LAN (Wired/Wireless) - Limited by connection speed.
- Internet (Wired/Wireless) - Dedicated TCP/IP ports need to be opened.
Point to Point Connection
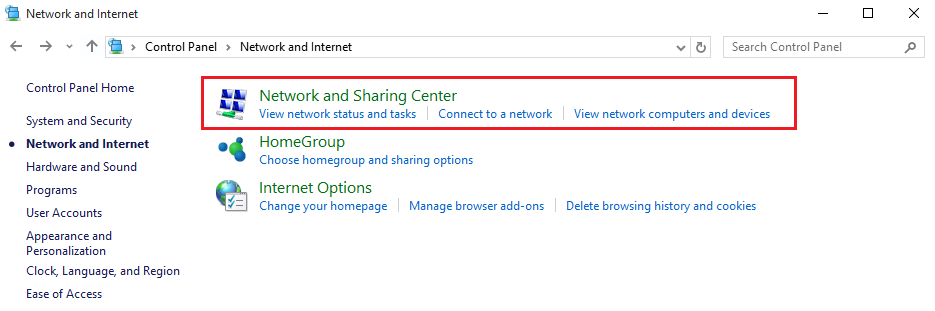
Two devices are connected with an Ethernet cable. To manually set IP addresses on both sides, go to Control panel - Network and Internet - Network and sharing center.
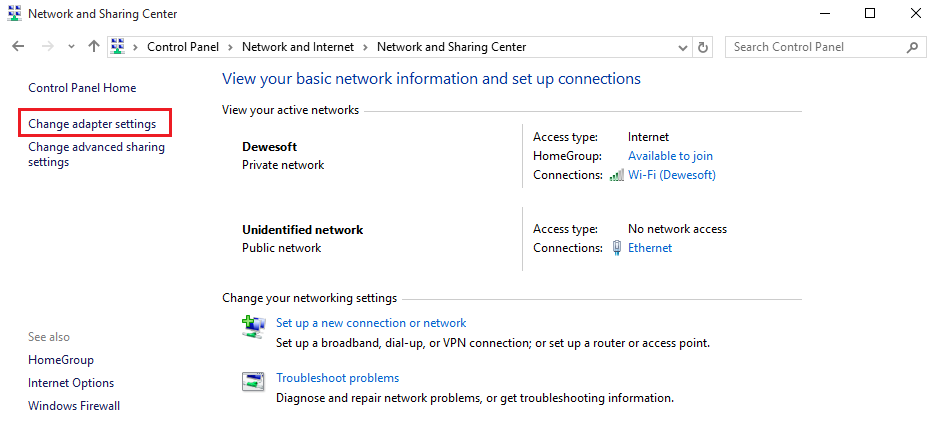
 Select Change adapter settings.
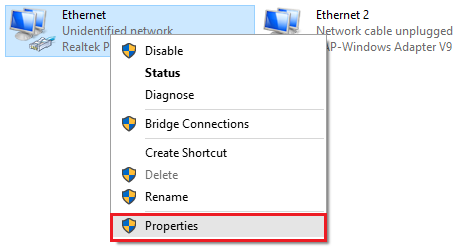
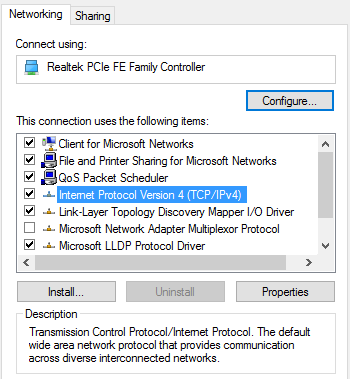
Right click on Local connections and select Properties.
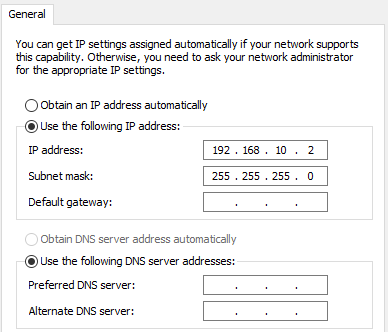
In Properties, choose Internet protocol Version 4 (TCP/IPv4) and type in the IP address.
IP addresses on both devices must be the same, except for the last number (e.g. the first IP address is 192.168.10.1 and the second one is 192.168.10.2).
You can now connect the devices, measure, and collect data.
Internet Connection
If you need to connect two or more DewesoftX instances that are on different locations and therefore unable to physically connect, you can use the solution described below in which we will connect them to the same VNC server.
Example - Zero Tier
We will use Zero Tier, but you can use any other provider that suits your needs as long as you follow configuration rules.
Register or log in to ZeroTier to access the admin console. You can now create your own network and get a 16-digit network ID which will allow you to connect to each DewesoftX instance. Press the Create A Network icon and enter a name. Other parameters will be filled automatically.

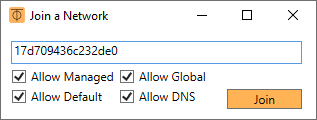
After successfully creating the network, go to Zero Tier - Downloads and install it on each DewesoftX instance to get a unique 10-digit node. Afterwards, start the ZeroTier One App from the DewesoftX instance you wish to connect and click the yellow icon in the bottom right corner. Select Join Network … and enter the 16-digit network ID from the ZeroTier admin console.
After pressing Join, you will see that new instance wants to connect in the admin console. You can authorize each instance individually as shown in the picture below. Please note that you can also see assigned IPs for each connected DewesoftX instance in the Managed IPs column.

To be sure that instances “see” each other, use the ping IP_address command in Command Prompt.
You can now follow Point to point instructions above to finish setting up Dewesoft NET. Be mindful of the following:
- Enable Allow remote connections to this system in DewesoftX Settings
- When connecting to the remote instance, use the IP which you will see in the ZeroTier console under “Managed IPs” as shown in the picture above.
- Synchronize the instances either with GPS or NTP
NOTE: For demonstration purposes, we used a VPN server which is at an unknown location. For higher bandwidth, we recommend establishing a server which is located in the middle of your DewesoftX instances.
Measurement Unit Configuration
There are several possible measurement unit - MU configurations:
- Standalone unit – not networked to anything (default)
- Slave measurement unit – can measure data under local control or control of a master client
- Master measurement unit – can measure data and control other measurement units
- View/Slave client – can view data being recorded on the measurement units, but cannot control them
- Master client – can control measurement unit(s) and view data
Master Client
- Can control measurement unit(s) -change the measurement system setup, storing strategy, start/stop measurements,… and view data.
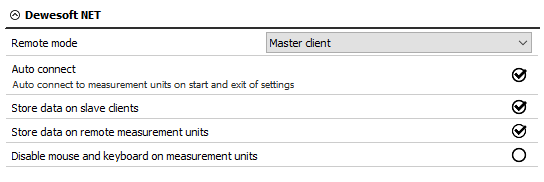
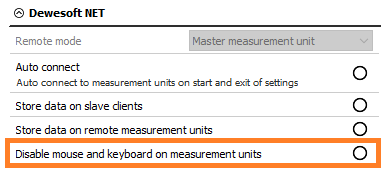
The disable mouse and keyboard checkbox can be used to prevent a local operator from changing any settings on the measurement unit or interfering with the test. This means that the measurement unit cannot be operated locally and you will have complete control over the client.
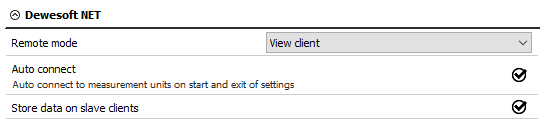
View Client
- Can view data being recorded on the measurement units, but cannot control them
- Only allowed to take a few channels from the measurement unit (up to the bandwidth limitation) and view and store the data on its local hard disk.
- Can initiate storing if the measurement unit is in Measure mode. However, when the Master client starts the storing, other clients will be taken over and the data will be overwritten.
Slave Client
- Similar to View client, but an additional computer can be connected to it, either Master or View client.
- Can initiate storing if the measurement unit is in Measure mode. However, when the Master client starts the storing, other clients will be taken over and the data will be overwritten.

Measurement Unit Setup
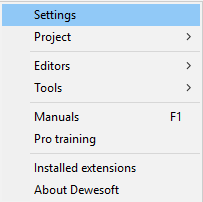
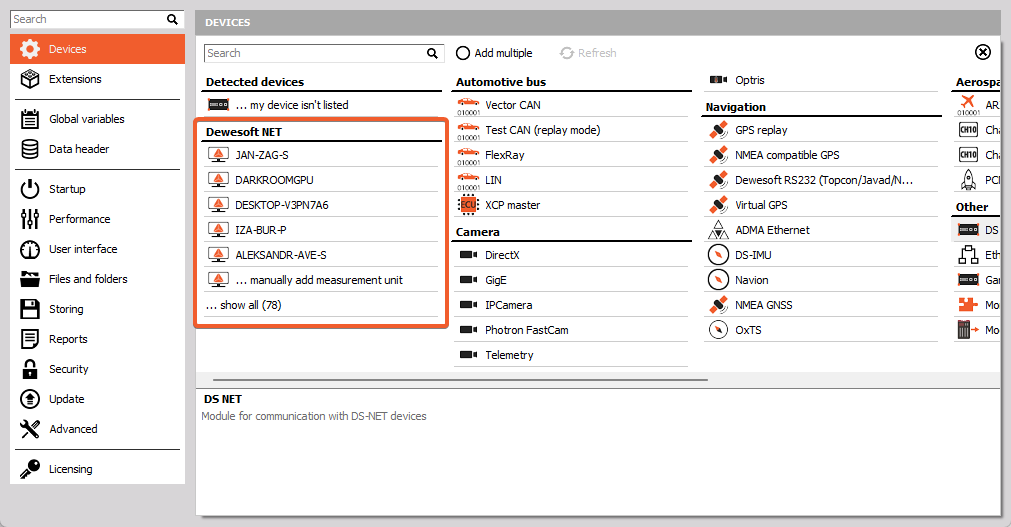
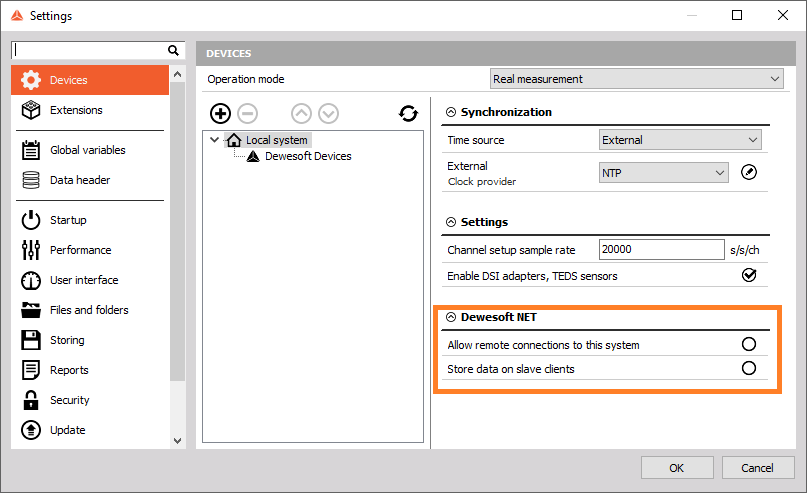
Dewesoft Launcher must run on measurement devices so that they can be seen as available. To activate the appropriate mode for each system within Dewesoft NET, open DewesoftXand then go to Options - Settings - Devices.
Operation mode must be set to Real measurement. To add new devices, click the plus button.
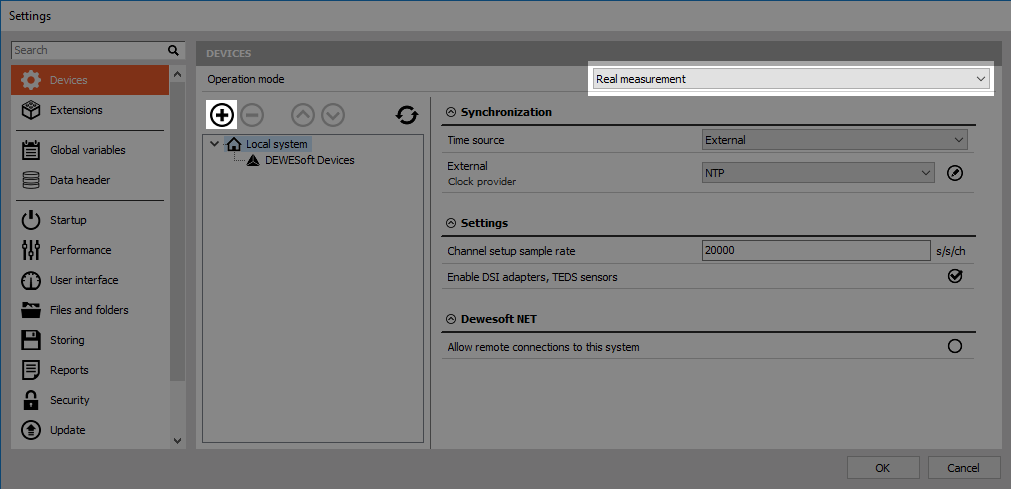
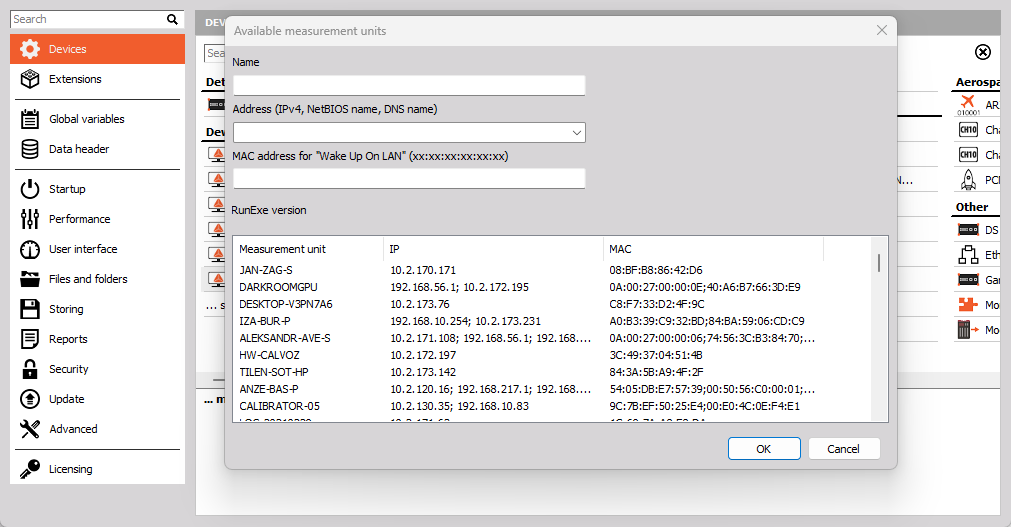
Under Dewesoft NET, select a new Measurement unit you wish to add. Click …show all to see all available measurement units and additional information (names, MAC addresses,…).
Master Client Setup
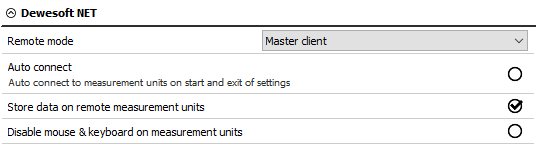
You will need one master client to control slave measurement units. You can assign this role in Options - Settings - Devices - Dewesoft NET.
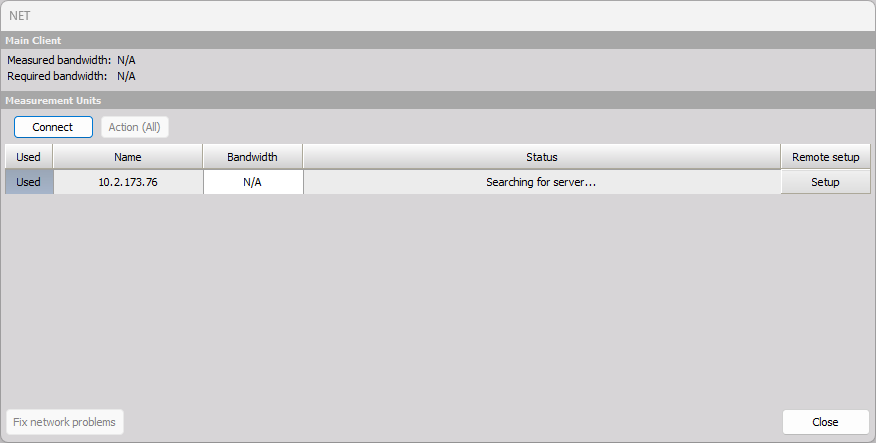
After confirming the Dewesoft NET setup, the following window will appear:

Click the Connect button to connect with the measurement unit.
Further setup can be done back in Settings - Devices.
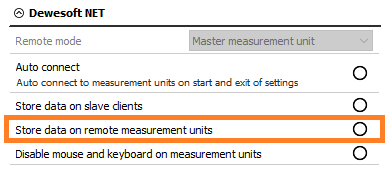
- Store data on slave clients
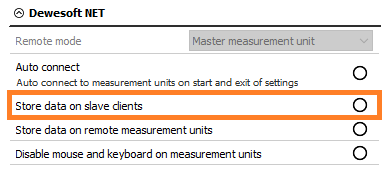
- Store data on measurement units (default, highly recommended!)
- Lock mouse and keyboard on measurement units
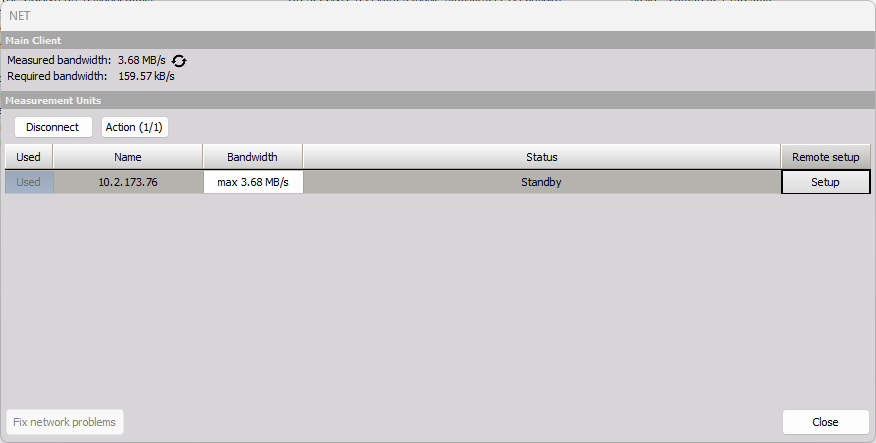
After successfully connecting, you should see the NET button, like in the picture below. If there are measurement units that you have not yet configured and connected, click the Add button and select one or more measurement units to add to the system.
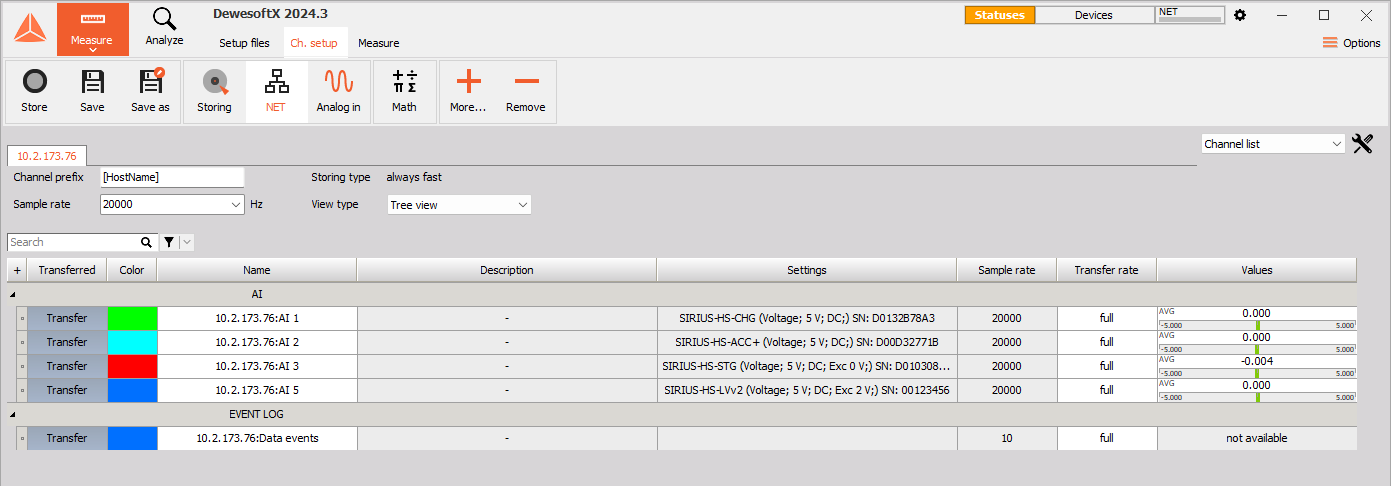
There is a NET icon in the status bar as well:

Clicking it will open the NET window. You can click the Refresh button next to Measured bandwidth to get updated information. You can compare it to Required bandwidth below. In a 100 Mb network, the transfer speed is ~10 MB/s, while Gigabit LAN offers speeds close to 100 MB/s. Real bandwidth is also limited by system performance.
Setting Up a Slave Client
If you want your unit to be a slave client, you must enable remote connections in Options - Settings - Devices - Dewesoft NET.
Afterwards, you can assign the role of Slave to the measurement unit.
In the example below, the system detects one measurement unit on the network, called SMU-1. Select it and click OK at the bottom of the dialog box.
Setting up a Cross Trigger
Cross triggers can be used with Dewesoft NET in tandem with triggered storing. This means that measurement units share triggers, i.e. one measurement unit will be triggered by a signal acquired on another. Absolute time synchronization (e.g. IRIG-B DC) needs to be used in order to enable this functionality.
You can activate cross triggers under the Storing options in the Storing module.

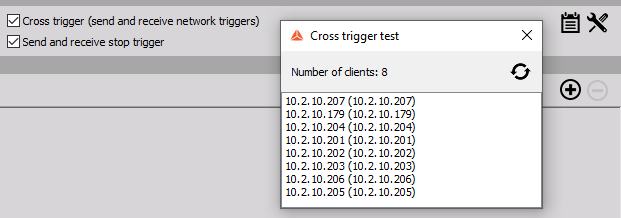
For the triggers to work properly, you need to configure additional settings. They can be accessed by clicking on the tool icon to the right. The proper network interface needs to be selected on each system and all systems need to be in the same Multicast group with an identical IP address. The Cross trigger delay is used if the network is busy and the information from one system to another can be delayed. The default value for the delay is 0.5 s.
If everything is set up correctly you will be able to see all systems listed when you click the list icon to the right.