Astro-Med Plugin Quick Start Manual
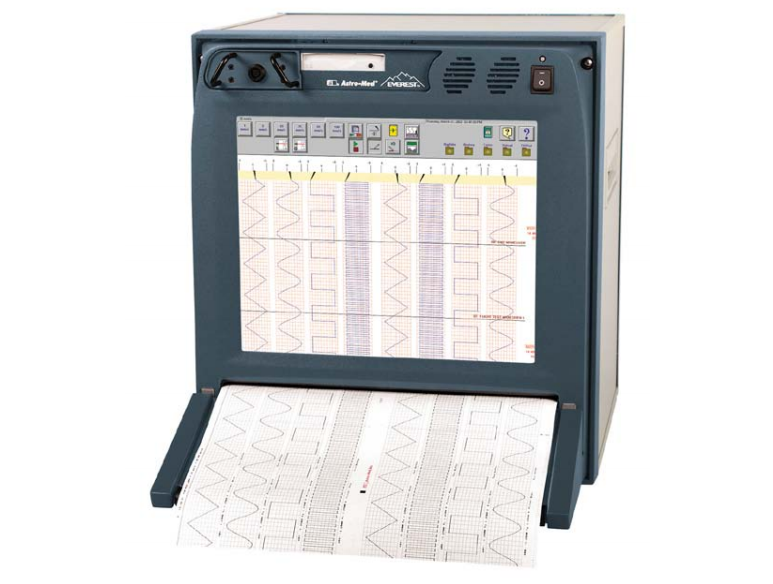
Enable plugin / Extension
Download AstroMed plugin from our Google Drive repository.
Then extract the AstroMed_1_xx.dll file to Addons folder found in the Dewesoft installation root directory.
License
You need a valid AstroMed Option license to use this plugin.
Add Printers
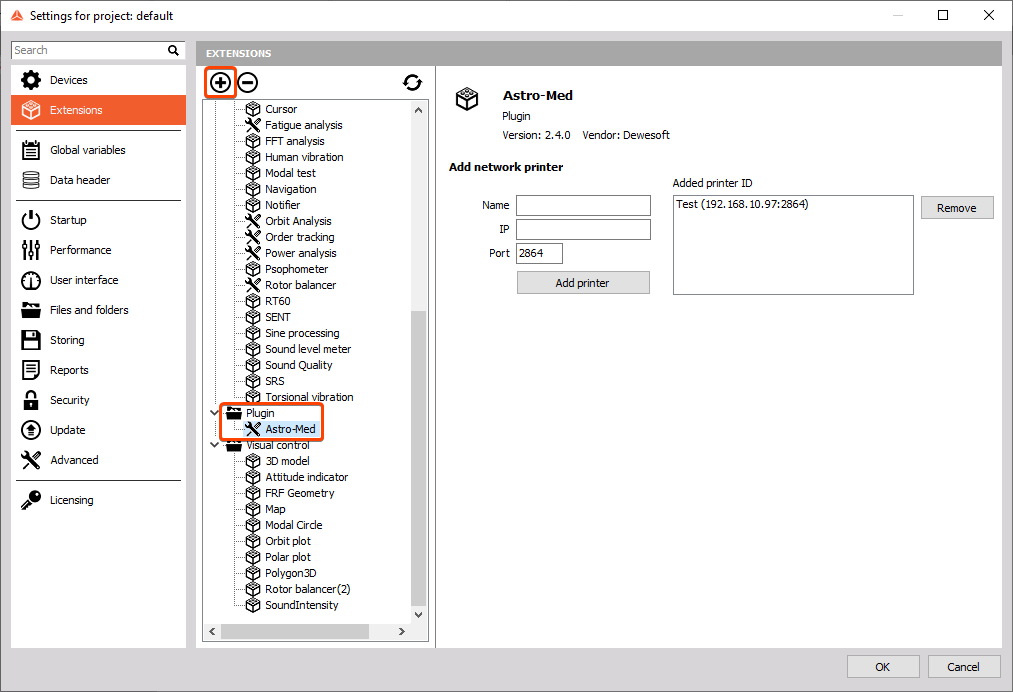
First you must add printers in HW setup. You need to know the printer IP and port number. The default printer port is 2864. You also must name the printer with a meaningful name if you have a multi-printer setup.
Channel Setup
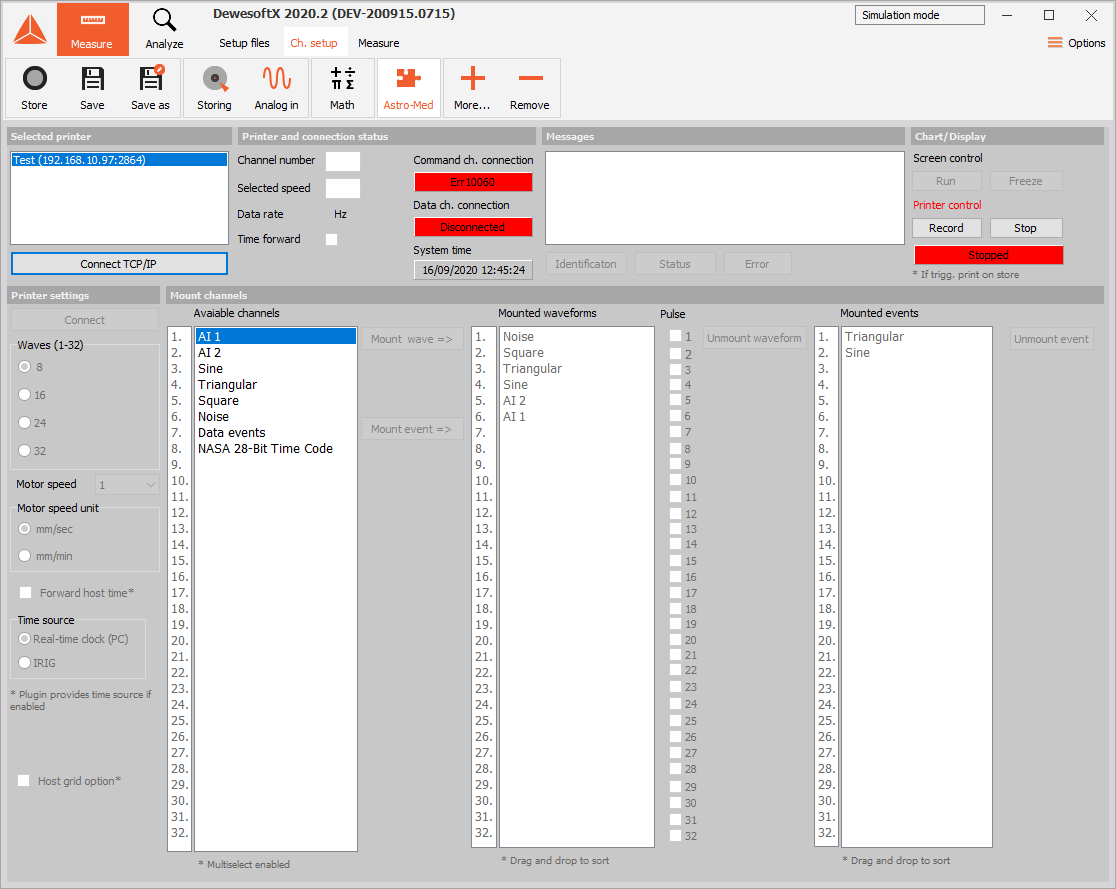
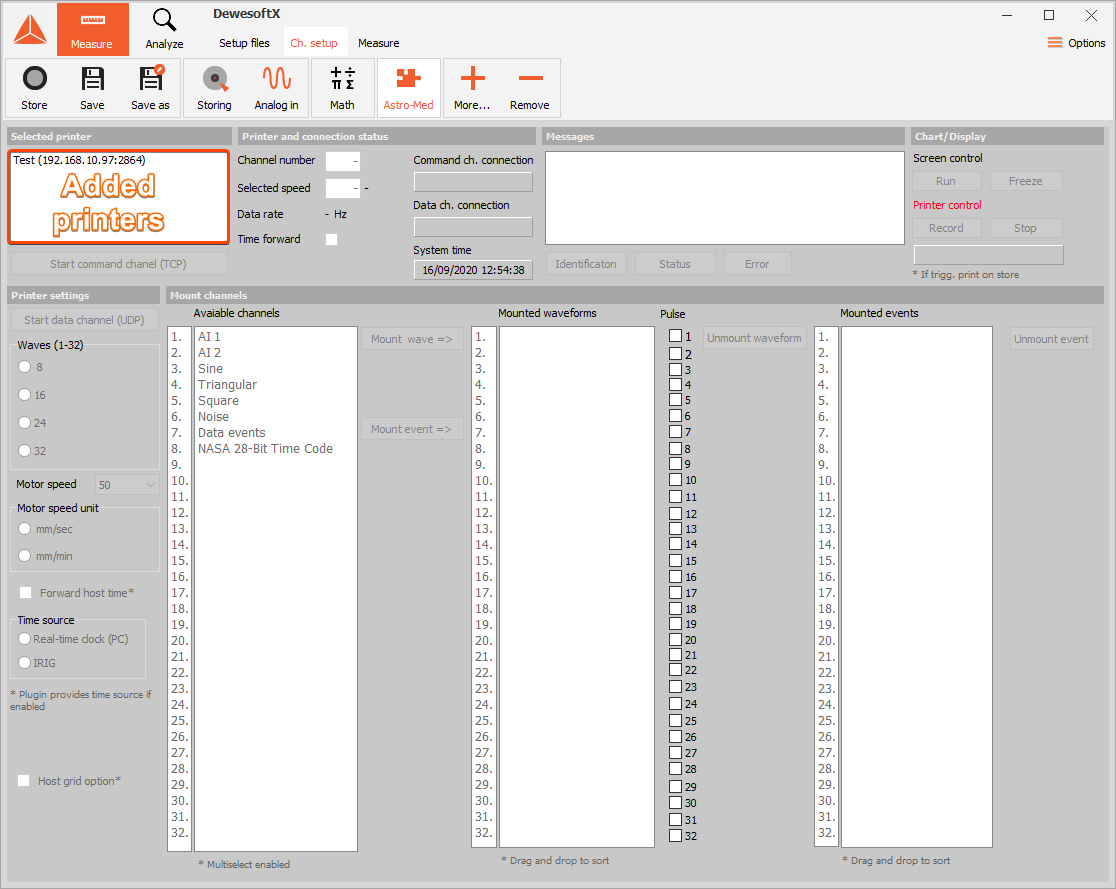
In Chanel setup select the Astro-Med plugin. You will see your added printer in the box in the left-top corner.
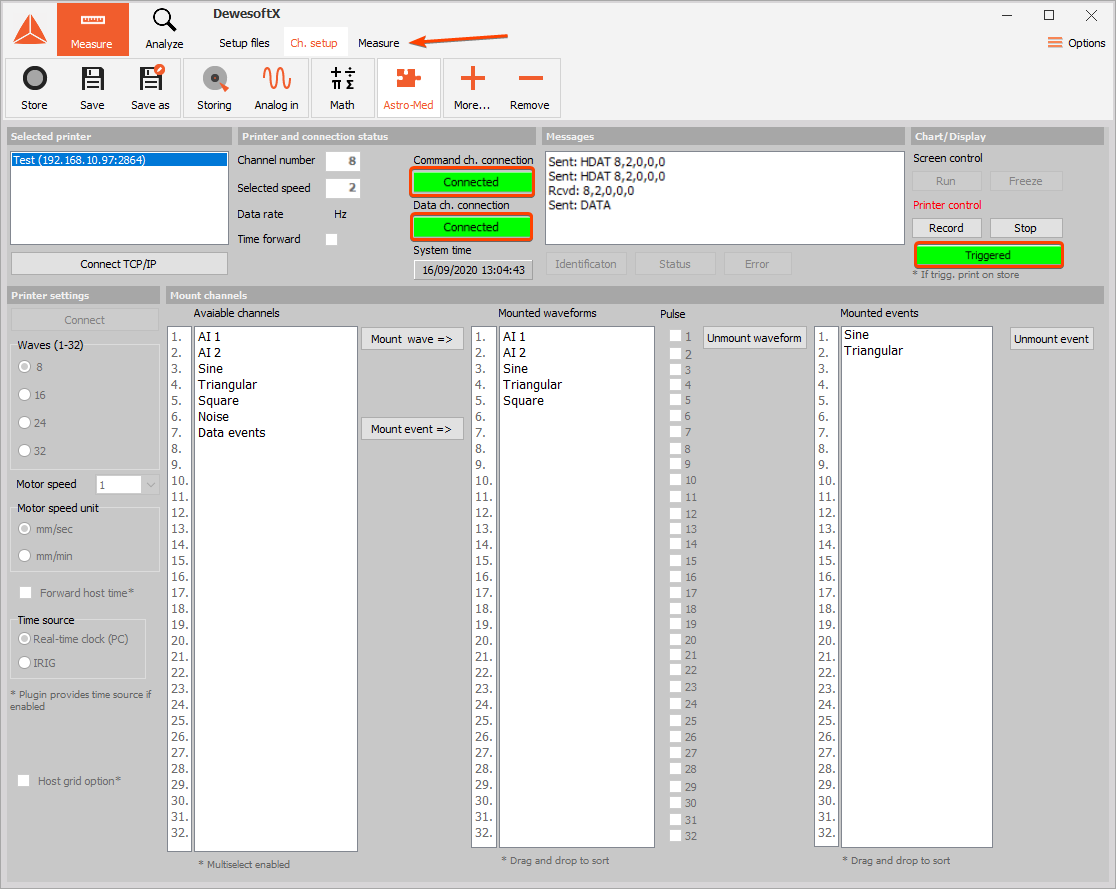
Now select the first printer and Connect TCP/IP button will be enabled. This button establishes the first socket connection that is used for controlling printer settings like chart speed, number of signal to print… Press the button and you should see the same result as in the picture below:
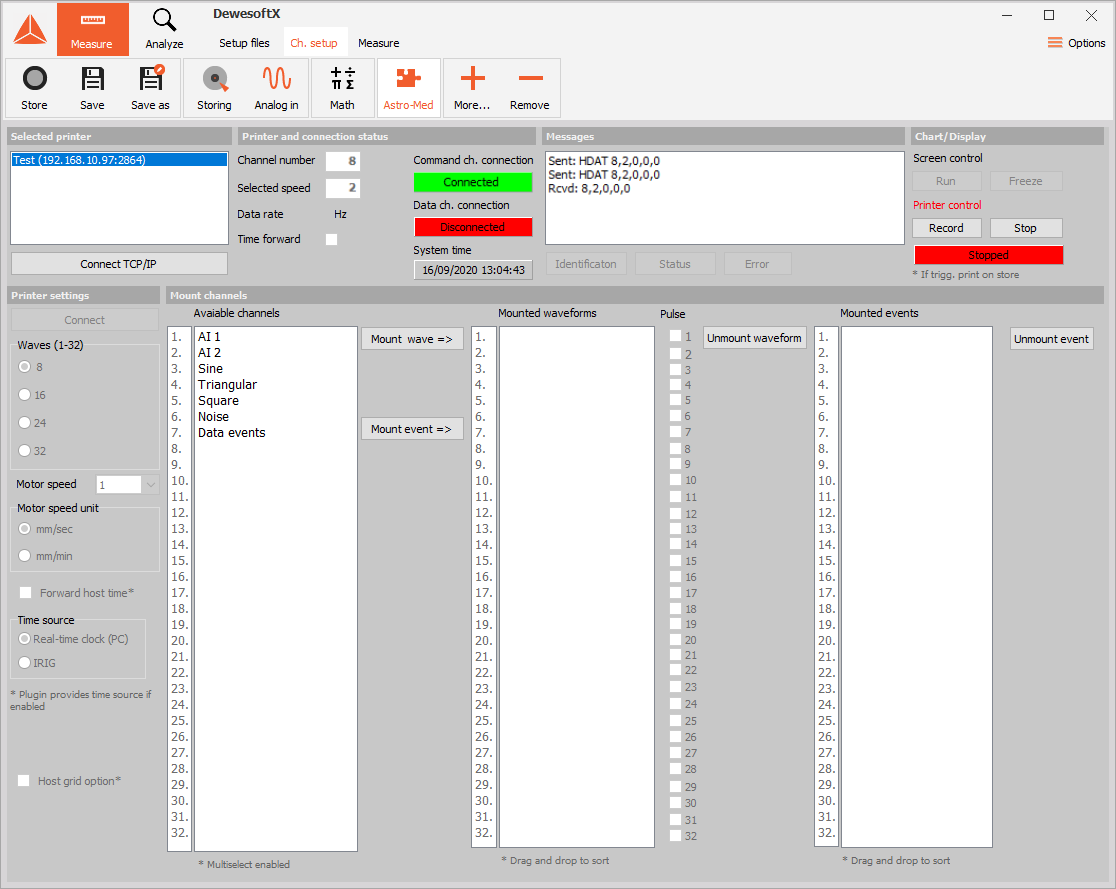
When you connect to printer the “HDAT 8,2,0,0,0” command is sent and that sets up printer settings. Please refer to the Astro-Med printer manual for details about commands sent to the printer. On the left of the screen, the Printer settings window becomes enabled. Now you can send different commands by clicking on enabled buttons. You can see printer status in the Printer and connection status window at the top of the screen next to the Selected printer window. This information will automatically update.
Mounting Channels
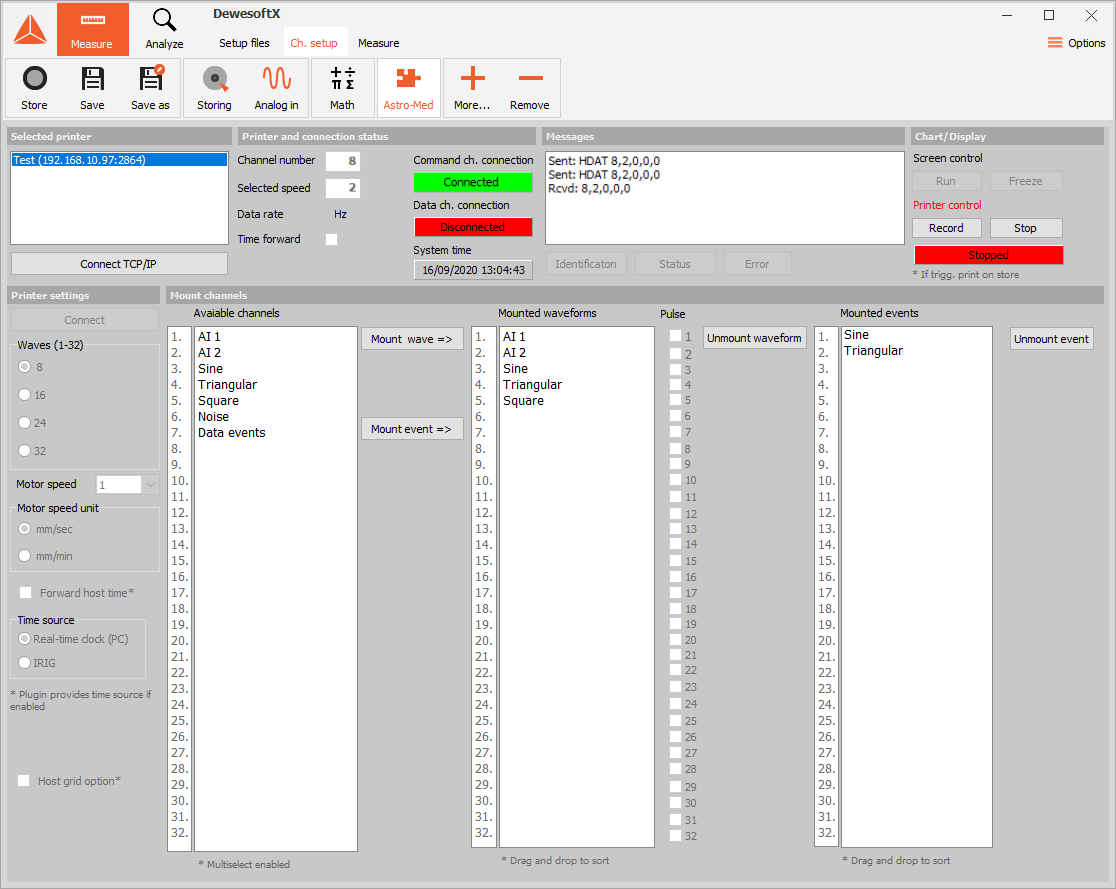
In the bottom middle window called “Mount channels” there are three columns. In the first column you can see Dewesoft used channels. To generate some sample signals a simple formula can be used. Or connect a measurement unit and enable Analog out feature to generate the sample signals.
In order to print used channels you must first add the desired channels to second or third column. To print waveforms mount/add channels to second column and to print events mount/add channels to third column.
- Every channel can be mounted as Event channel. So if you mount sine signal with amplitude from -10V to 10V the values from -10V to 0V are low state and values from 0V to 10V are high state.
- It is possible to mount multiple channels at once using Shift+UP/DOWN in first column.
- Mounted channels can be sorted using Drag/Drop function in second and third column.
Sending Data to Printer
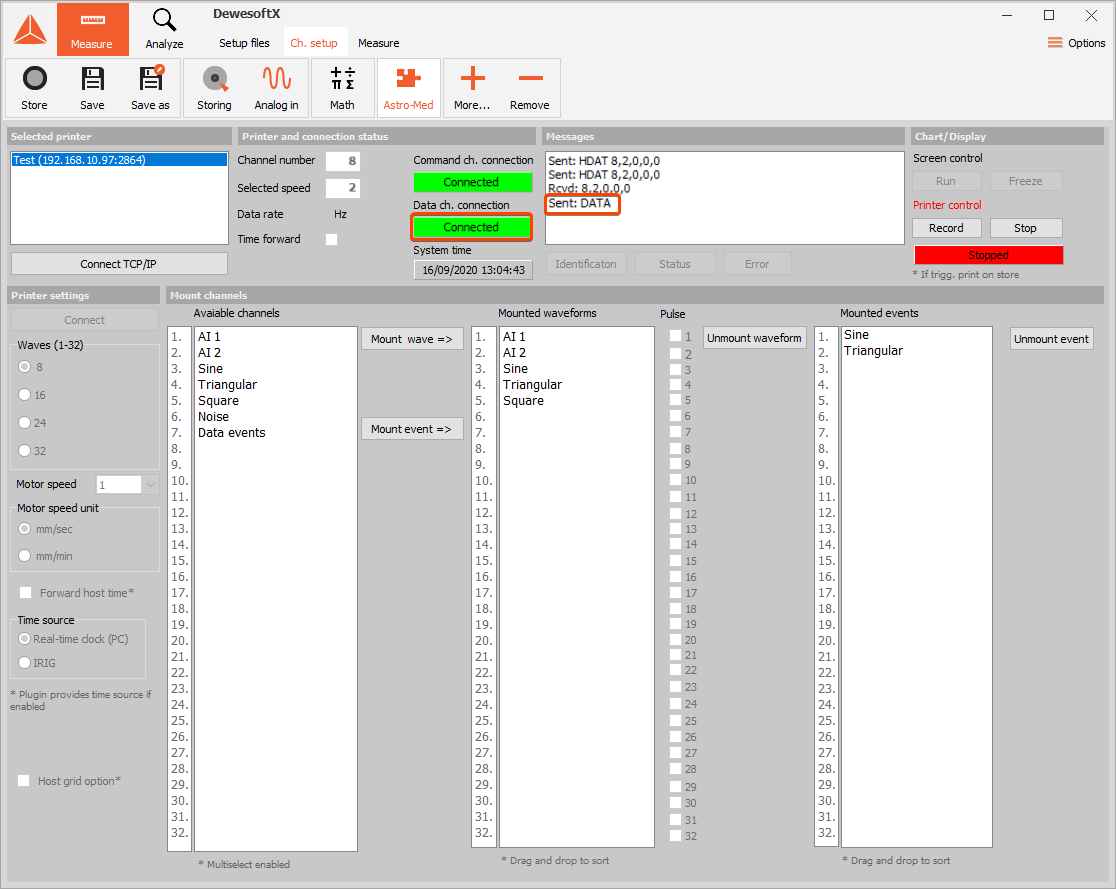
Now you are ready to send some data. Press “Connect” button in “Printer settings” window. The second panel should now be color green if everything is ok. Also when pressing the Connect button a “Data” command is sent to the printer that toggles the printer in wait for data mode.
Measure Mode
Now you are ready to send data to printer. Press measure button and data will be start being send to your printer. You should see data being send on the printer display but the printer won’t start actual printing yet.
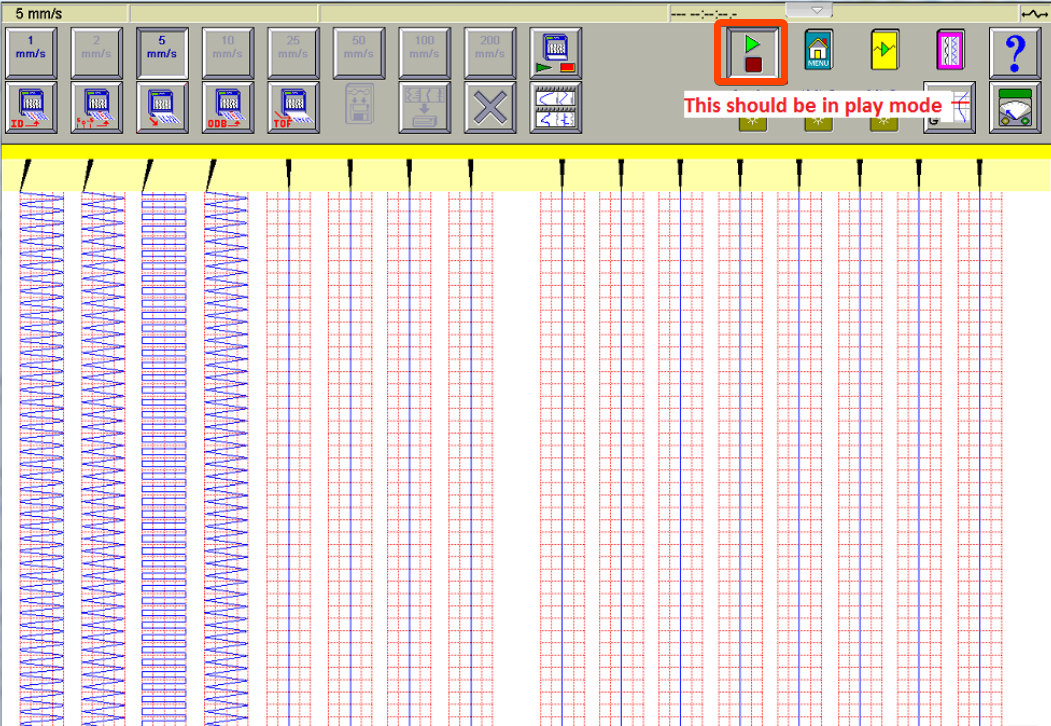
If you don’t see the data check the button state in the picture above. If it’s red go back to ch. setup, select the printer and press Run button on the top right window. But first you must disconnect data connection (bellow disconnect button) to enable this button. Reconnect data connection before you go back to measurement.
Printing
To start printing, you must first trigger the printer in Channel setup. Select the desired printer in the Selected printer window and press the Record button in the top right Chart/Display window. A label called trigger changes color to green if you do so. Now check if all three panels are colored green and press the Measure button above.
If you press Record the printer will start printing. The printing will stop when you press Stop. In you don’t want to print, only store data, go back to Channel setup and press the Stop button in Printer control. In Stopped mode, the printer won’t print if you press Store in Measure mode.
Troubleshooting
Before connecting to your printer, you may want to ping it first to verify that the network connection is configured correctly.
When you press Connect TCP/IP, the Connect button and the panels in Signal connection and Data connection don’t switch to green, there is a network problem. You will get a red error notification.