OPC-UA client plugin
The OPC-UA communication standard for industry 4.0 and Iot, providing standardized access to industrial machines and devices.
To use the OPC-UA Client plugin in DewesoftX, a valid Dewesoft license is required. Please refer to the official OPC-UA Client plugin manual for help.
Global Settings
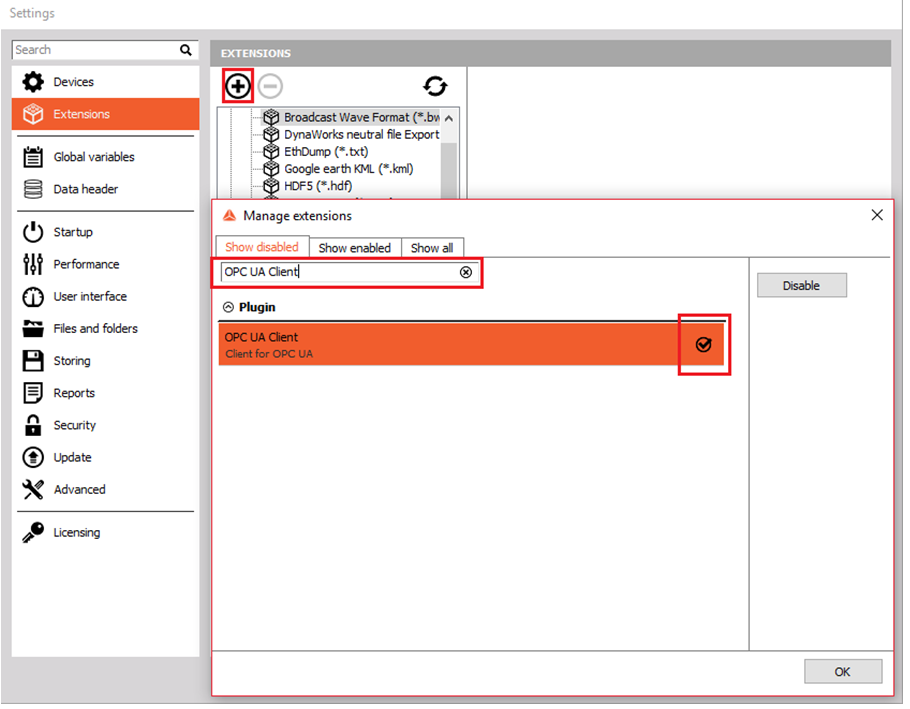
Under HW settings go to the Extension option and click the plus sign. Then find the OPC UA Client plugin in the list and activate it as it is shown on the following picture.
To add further settings click on the added OPC-UA extension and the window with following settings will appear.
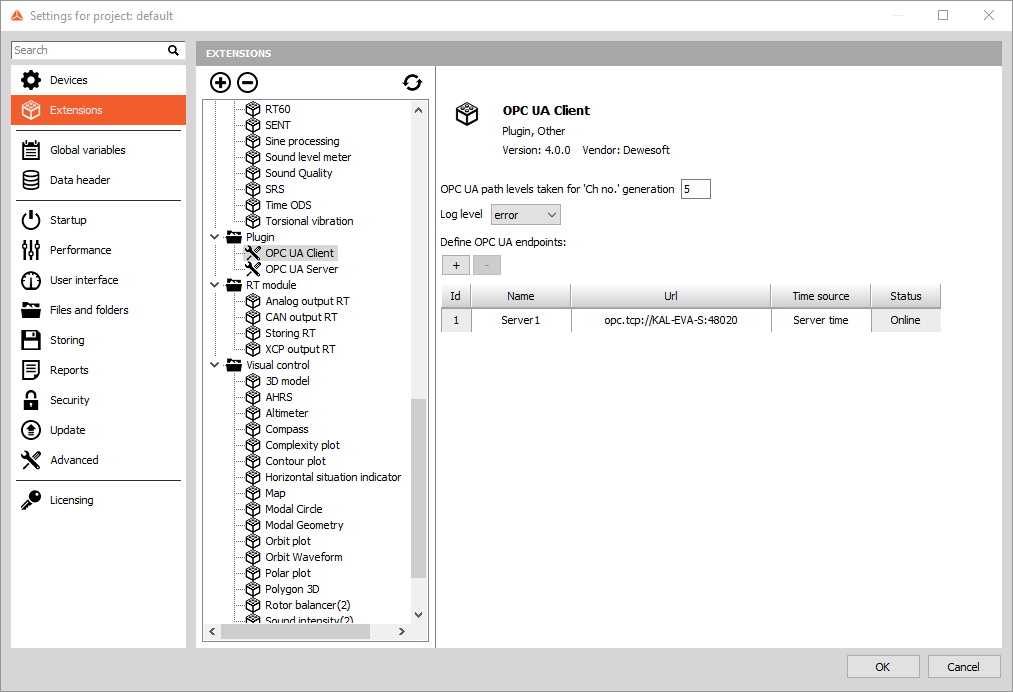
- Log level - the level of log that will be saved durring the acquistion. The log can also be disabled, by choosing option Off.
- OPC-UA path levels from “Ch. no. generation - Ch.no provides additional information of the channel. The user gets the tree-path of the file up to the selected level.
- Adding the OPC-UA server - by clicking on the plus button the user can add an option to define the OPC-UA endpoint.
- User can choose a custom name for the server for a better differentiation.
- The URL of the OPC-UA server need to be entered
- Time source can be either Server time, which means that DewesoftX will use timestamps, that are included in OPC-UA data package. Or you can choose Local time, which means that DewesoftX will set the timestamp to received data.
- Status will show you if the server is online (available) or offline.
OPC-UA Client setup
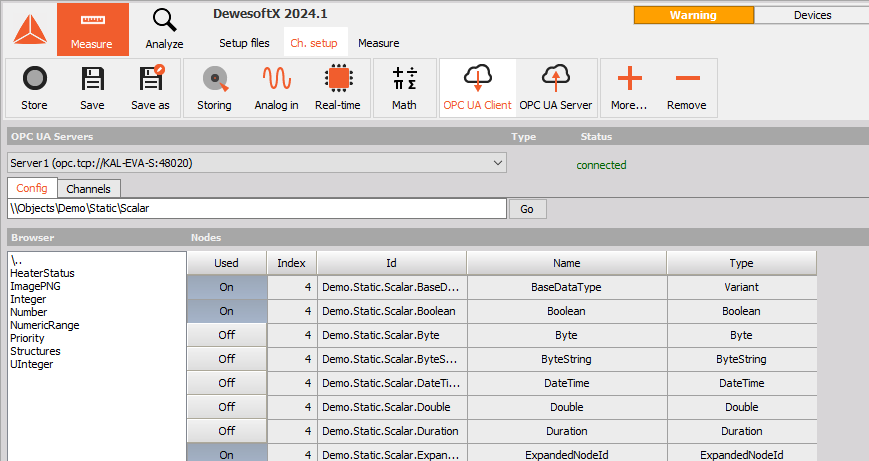
On the top of the OPC UA Client setup screen there is a drop-down menu, where you can select which previously added OPC-UA Server you want to access. If the Server is properly configured and Client is connected a status Connected will apear.
Under Config tab you can browse through the OPC-UA structure of the OPC-UA server. Under Nodes you can see nodes contained at chosen path along with properties: Index, Id, Name and Type.You can select which nodes you want to transfer to DewesoftX with the Used toggle (Off/On) button.
In the Channels tab all the selected OPC-UA channels are listed. For each channel you can see its ID, Data Type and current Value.
For each channel you can define the channel color, name and the wanted sample rate. The maximum sample rate also depend on the OPC-UA server settings and capabilites. When you right-click on the Sample rate column you can set the sample rate to maximum - depending on the server limitation. Under the throughput column you will see the actual sampling rate of this channel.
The channels that are added to DewesoftX are always treated as asynchronous data.

NOTE: Currently only Methods without inputs are supported.
Read/Write channels
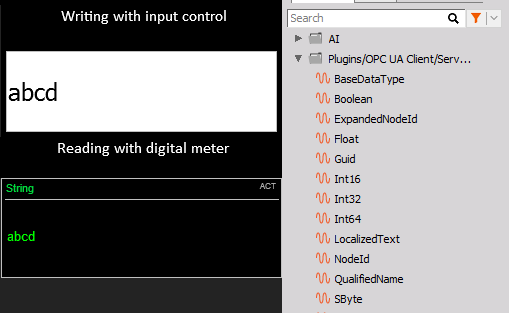
If the node from the OPC-UA server supports Read/Write functionality, you can assign those channels to the Input control widget. This way, you can also change the node’s value on the server site.
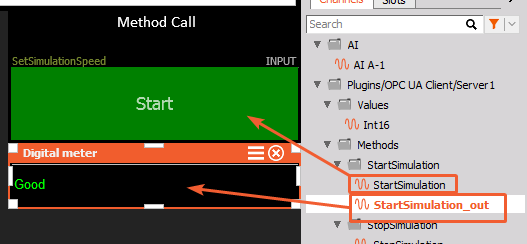
Control Channels
The OPC-UA Client plugin supports calling OPC-UA methods, without any input arguments. Once you select your Method node in OPC-UA client, you can easilly assigned it to the input control widget. Use the Push button so you can easily call the methods.
Addiitonally you have the status channel, so you can check if the method call was succesful.