XCP MASTER
Hardware setup
XCP/CCP device definition
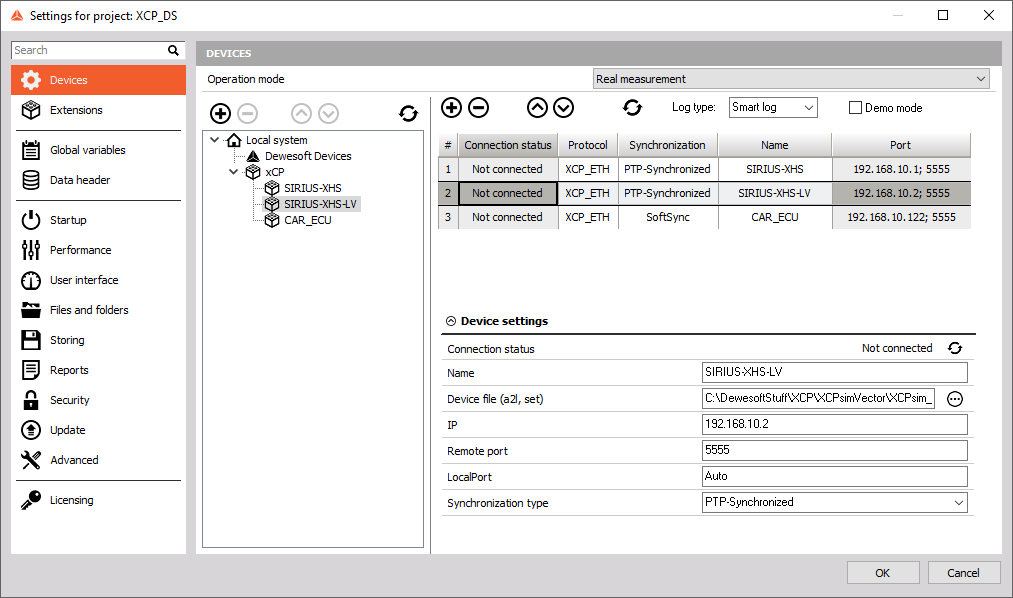 Devices are defined in Hardware setup. Plugin supports those protocols:
- CCP
- XCP over Ethernet (UDP or TCP)
- XCP over CAN or CAN FD
Add button will open file explorer, where you select one or more a2l files with all the XCP/CCP device information. Information provided in a2l file will be automatically set (IP, ports, baud rate…). Some information like interface type, name and preferred synchronization type have to be selected manually because that information is not contained in a2l file. Keep in mind that a2l file name is used as a unique identification of a device. This unique identification will also be used when loading setup.
For CAN devices CAN port must be selected. Selected CAN port will then be exclusively assigned to the XCP plugin. Second parameter is the Baud rate. It must be selected even if it’s the same as the chosen CAN default baud rate. Usually it’s documented in a2l file and set automatically.
For Ethernet devices IP and port are needed for successful connection. Usually both are part of a2l file and set automatically. Just make sure your Ethernet port is set accordingly for XCP device IP to be accessible.
NOTE: If you’re transferring data from RT devices, via XCP over Ethernet, we recommend setting the maximum calculation delay setting to a value of 300 - 500 milliseconds.
CAN setup
CAN port operation mode must be set to Read/Write/Acknowledge to use it for XCP data transfer. None special device should be selected.

Connection and synchronization

Devices are connected and synchronized automatically as soon as connection and synchronization is available. Disconnect is also auto detected. It works in setup and also in measure mode. If you go to measure with a disconnected device it will be connected and started as soon as possible. If devices get disconnected while in measure, it will try to reconnect and will be started ASAP.
Synchronization
Two type of synchronization are available:
- SoftSync
- PTP synchronization
First one is always available and suitable for low sample rates up to 1kHz. PTP synchronization is needed for high sample rate devices.
There is also additional synchronization for CAN interface (CCP or XCP over CAN). Normally the XCP timing will be used for synchronization, but with CAN there is an alternative.
 CAN timing (time of CAN messages) can be used for synchronization. If CAN timing is selected additional fixed delay can be defined.
Some devices do not support XCP timing. In those cases CAN timing is the only choice.
XCP setup in Local system
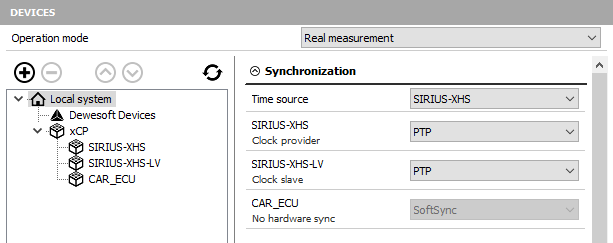 If there is no Dewesoft device available, an XCP device can be selected as Time source. In any case, an XCP device can be either softsynched or PTP synchronized if PTP synchronization is available. If PTP synchronization is selected and not available in the system data acquisition won’t be started. Device will stay in “not synchronized” status.
Log options
 Log option is a debugging tool. If selected all the XCP communication is logged and can be later checked by the user or sent to Dewesoft for debugging purposes. Each device has its own log file. Log files are stored in the Dewesoft Logs folder and named “XCP_DeviceName.log”. They are overwritten every time you start Dewesoft. There are three levels of logging available:
- No log
- Smart log
- Full log
No log means logging is switched off.
Smart log will log all the communication except data. It will log some data at start of acquisition, but switched it off after around 100 data packages.
Full log will log everything including all the transferred data. It’s just needed when there is an error in the data itself. Be careful using it, because it can cause performance issues on high sampling rates (> 1kHz).
Adding seedkey
When you want to connect XCP/CCP to a locked ECU, you will need a SeedKey .dll file which has to be provided by the ECU manufacturer. The seedkey .dll file must be added to the Addons folder in the Bin folder at installation folder of DewesoftX.
If SeedKey is 32-bit you will need 32-bit DewesoftX and XCP plugin, but if you have a 64-bit seedkey.dll file you need 64-bit DewesoftX and XCP plugin. The name of the SeedKey .dll file is specified in .a2l file.
Setup
Setup can be done online (when the device is connected) or offline (when it’s not). Data acquisition is not running in setup, so there is also no data preview in setup mode.
Because XCP/CCP devices have limitations on how many channels with different rates can be transferred, configuration check will be done in real time. This is only possible if device is connected and its limitations are known.
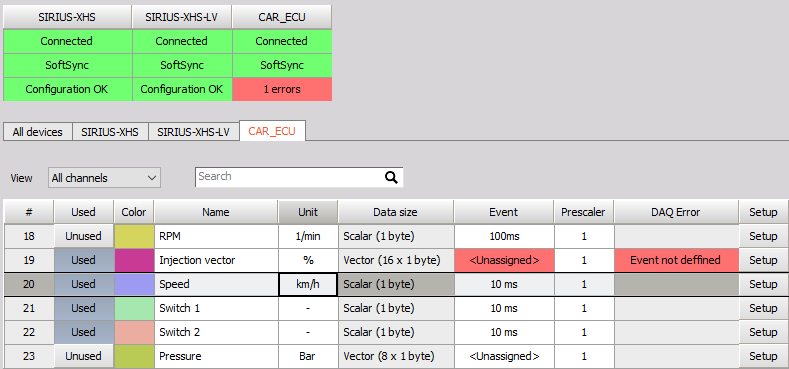
All the signals are already defined in ASAP file (a2l). They are read and shown in device channel setup. If they are grouped also the tree view can be used. Channels just need to be selected and connected to suitable event. In addition, a prescaler can be selected if needed (signal sampling rate will be divided by it). Colors and names can also be changed directly in the list.
In addition to device tabs (one for each device) there is also an “All devices” tab with all the channels from all devices. It’s there to simplify setup for multiple devices with low channel count.
Keep in mind that XCP devices and used buses have limitations and select just the channels which are really needed.
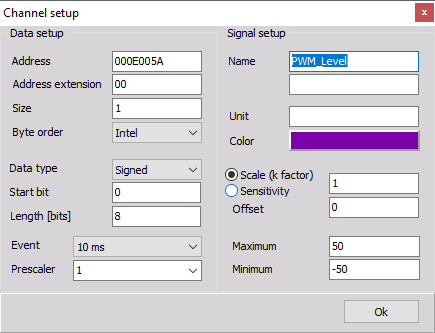
Other signal parameters can be accessed with the setup button. This way all signal information is shown and can also be changed.
Copy/Paste funtionality
From release 23.3 onward xCP Master module has been updated to have copy paste functionality. The functionality becomes a powerful tool when handling big a2l files, also for carrying the XCP module settings between setups using the same a2l files.
Few things to point out:
- Copy paste option is only working when pasting to the same .A2L file the copy was made from!
- When pasting the channel settings, XCP module view must be set to “all channels”.
- Names of events are defined by .a2l file and only these names will be recognised when pasting settings back to XCP module. (watch for spaces, dots, etc.)
- Copy paste functionality can be used if there are multiple XCP devices connected.
- When multiple XCP devices are connected, functionality is not working in “all devices” xCP instance tab!
Example of functionality:
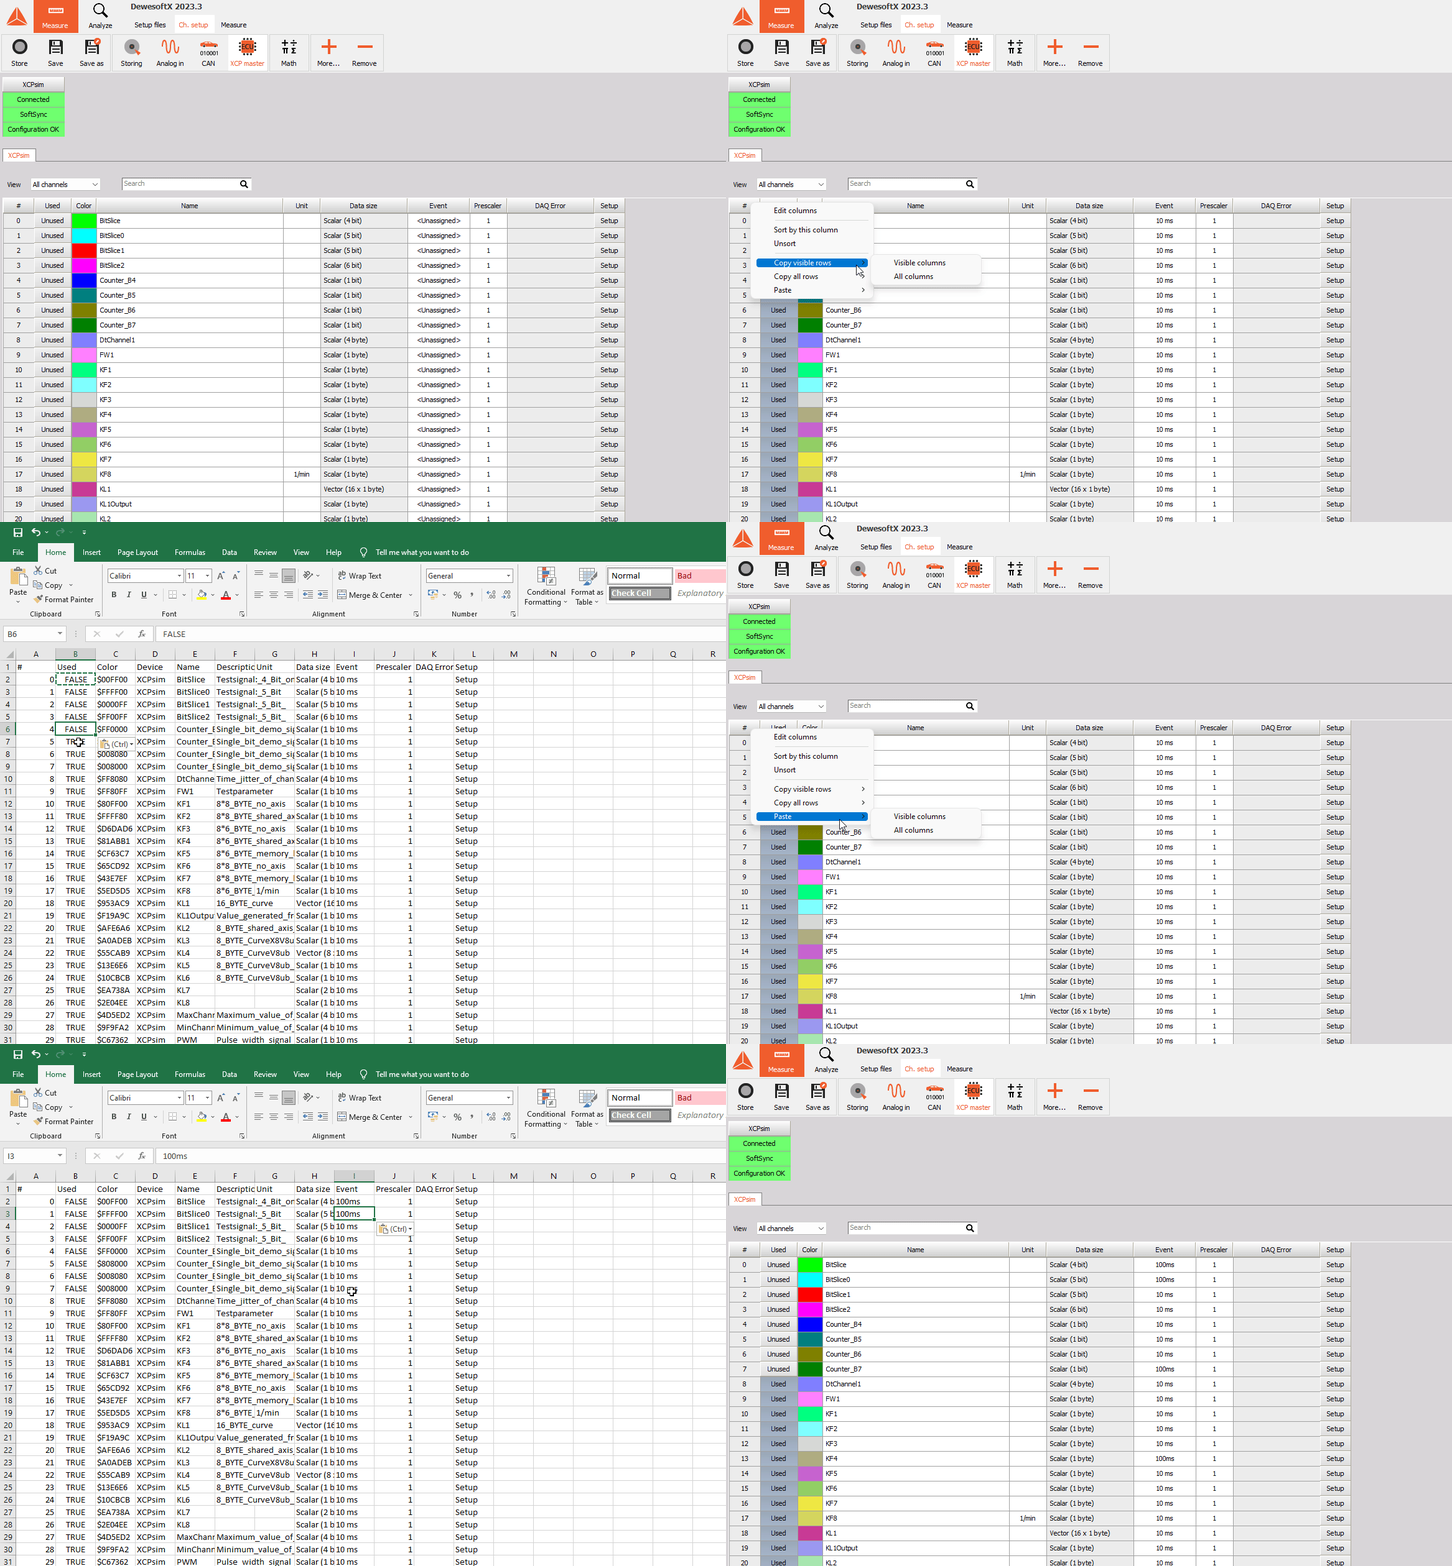
Functionality explanation: - Copy all rows Will copy every row in the XCP module channel list. You can copy all of the columns or just the columns that you have in your XCP module channel grid.
Copy visible rows Will copy only visible rows in the XCP module channel list. With this functionality you can copy only used channels if “view” is set to show only used channels. Be aware that pasting the settings you must switch back to view all channels! You can copy all of the columns or just the columns that you have in your XCP module channel grid.
Paste You can copy all of the columns or just the columns that you have in your XCP module channel grid.
Measure
In measure mode, XCP signals are Dewesoft channels like any other. They are grouped by devices in the channel selector.
Because of the XCP device and used bus limitation it can happen that some signals data will not be transferred. For example 8byte signals can’t be sent over CANbus.
