Sound Quality

Dewesoft’s Sound Quality module allows you to calculate psychoacoustics parameters such as loudness, sharpness, noise criterion, noise rating, articulation index and speech intelligibility.
- Required hardware: Dewe 43, SIRIUS, SIRIUSX, IOLITEX or SIRIUS Mini
- Required software: Dewesoft X3 SP9 or newer
- Minimum sample rate: 48kHz
After configuring the hardware (microphone installation and setup) you can add Dewesoft’s Sound Quality plugin by selecting the More modules button followed by Sound Quality in the Acoustics section.
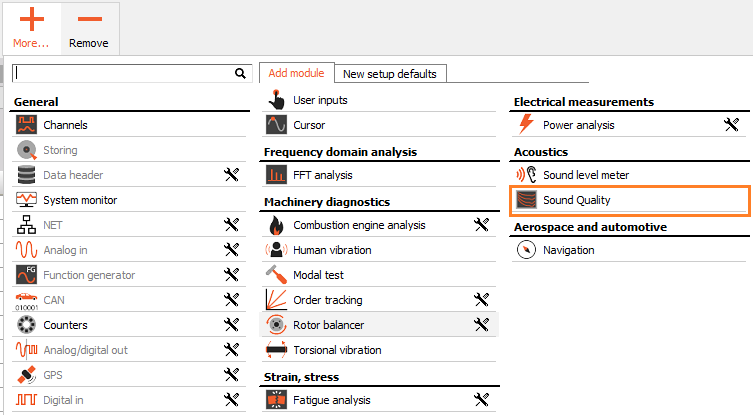
For instruction on how to add new modules see the Add module page.
Setup
After you have added the Sound Quality plugin the following screen will appear.
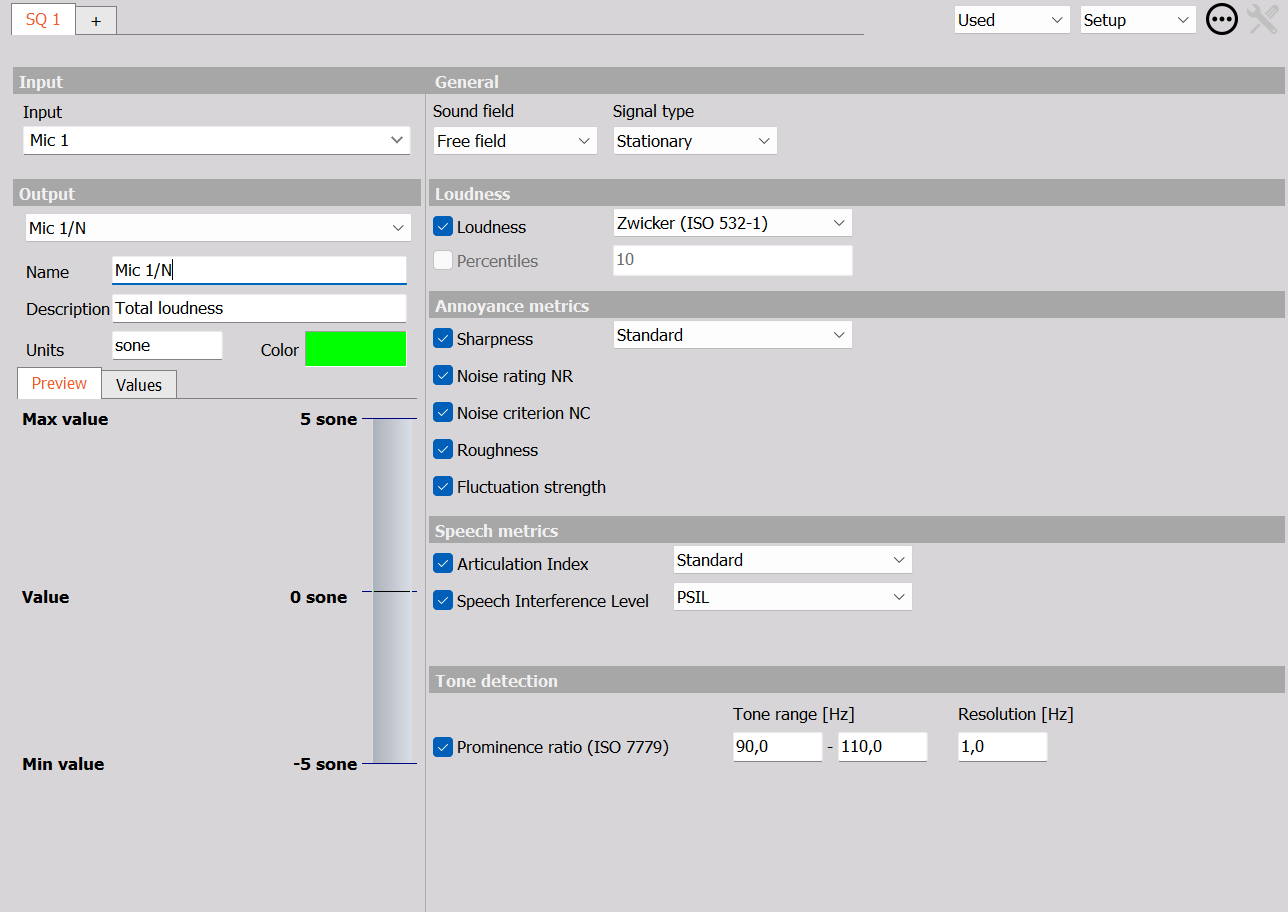
The setup consists of the following sections:
- Input channel selection
- Output channel options/preview
- General settings
- Loudness metrics
- Annoyance metrics
- Speech metrics
Input channel selection
Before you start using the Sound Quality application you must select input channels.
There are two input channel dropdowns, Input 1 and Input 2. If you will be using the application for monaural recordings, only Input 1 should be selected. Otherwise, if a binaural recording will be used, both Input 1 and Input 2 should be selected, Input 1 representing the Left ear and Input 2 representing the Right ear.
Output channel options/preview
The lower left area of the setup displays the output channel settings. It consists of the following properties:
- Name: Name of the channel. This name will be used in the channel setup list as well as in the channel selector for widgets in measure mode.
- Description: Description of the channel, which will be shown in visual displays.
- Unit: Unit of the channel, representing the physical measured unit.
- Color: Color in which the channel will be represented on widgets.
Under the Values tab, the minimum and maximum for a channel can be manually adjusted by unchecking the Automatic min/max checkbox and inputing a custom values.
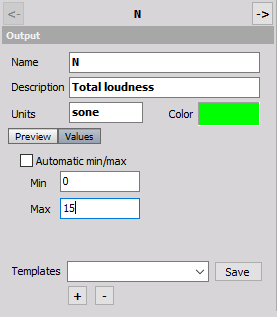
You can switch between channels by clicking the <- or -> buttons at the top of the section.
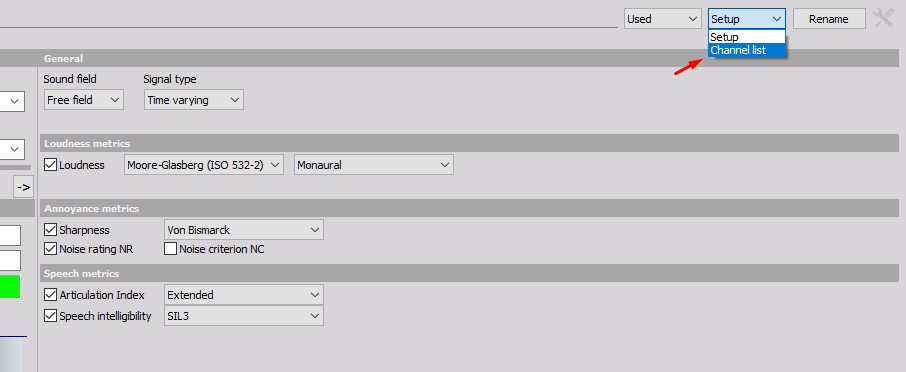
General settings
Under the General section, you can set the sound field and signal type. There are two options for the sound field, Free field and Diffuse field and two options for the signal type, Stationary and Time-varying.
Loudness metrics
Under the Loudness section, you can click on the checkbox next to the Loudness label to so add loudness metrics to output channels. This will output the Total loudness and Specific loudness into two seperate channels.
The two currently supported loudness standards are ISO 532-1 (Zwicker) and ISO 532-2 (Moore-Glasberg)
If the Moore-Glasberg standard is selected a new dropdown will show up, where you can select what kind of recording you will be using, monaural or binaural.

NOTE: If the binaural recording is selected as the recording type then Input 2 in the input channel selection must be selected as well.
Annoyance metrics
Under the Annoyance metrics section you can select between:
- Sharpness
- Noise rating
- Noise criterion
- Roughness
- Fluctuation strenght
You can select the wanted metric by clicking on the checkbox next to metric’s label. If the Sharpness metric is selected for calculation a dropdown menu will be enabled where you can select the type of sharpness weighting. There are three weightings currently availabe: Standard , Aures and Von Bismarck.
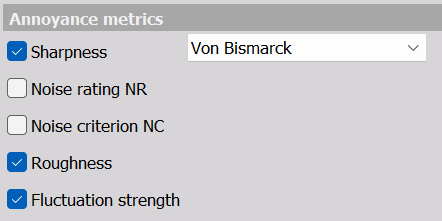
NOTE: To enable the sharpness calculation the loudness calcualtion must be selected first, since sharpness depends on the loudness calculation
Roughness and fluctuation strength focus on the perception of modulation in sounds, such as amplitude or frequency modulation.
Roughness
Roughness is associated with the perception of rapid amplitude modulations in a sound and is often linked to a sensation of harshness or raspiness. It is typically evaluated for modulation frequencies ranging from about 15 Hz to 300 Hz. This range corresponds to modulation rates that are fast enough to create a sense of fluctuation without becoming individual beats.
Fluctuation strength
Fluctuation strength is concerned with slower amplitude modulations compared to Roughness and is perceived as a “slow variation” or “wavering” in sound. The typical range of modulation frequencies for fluctuation strength is from about 0.5 Hz to 20 Hz. This range corresponds to modulations slow enough for listeners to perceive variations in loudness or frequency over time.
Speech metrics
Under the Speech metrics you can select the Articulation Index and the Speech Interference.
Two calculation methods, Standard or Extended can be selected for the Articulation Index. You can choose the calculation method by first clicking on the checkbox next to the Articulation Index and then selecting the wanted method from the dropdown list.
For the Speech Interference you can choose between three speech interference levels: PSIL, SIL3 and SIL4.

Channel list
If you would like to check the list of all output channels that the Sound Quality module is currently outputing you can click on the dropdown in the upper-right section of the setup screen and change it from Setup to Channel list.
A list of curreent output channels will appear. You can now tweak channel values as you could in the Output channel options. Values can be edited by left-clicking on the wanted property. A text cursor will apper and you will be able to change the value.
The Used property is not displayed as values for each output channel but rather as a property of the Sound Quality application as a whole. By changing the value from Used to Unused you will disable all output channels.
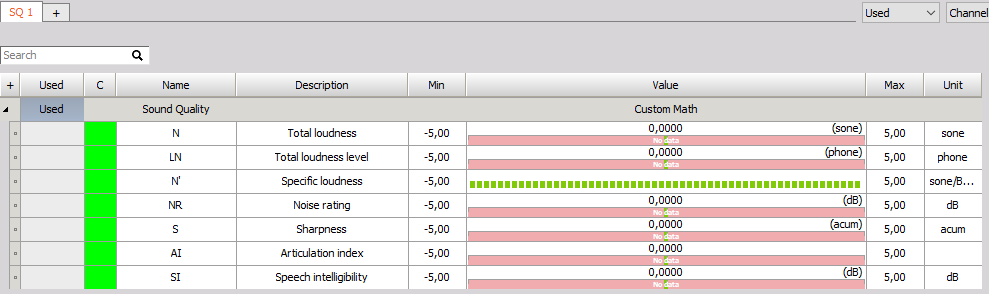
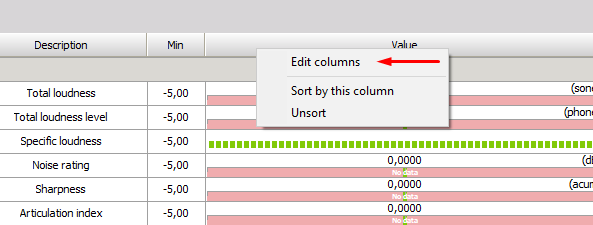
You can show additional columns by right-clicking anywhere on the header row of the table and than clicking on the Edit columns option. There you can select or deselect wanted properties.
For more information about Channel lists please reffer to the Channel grid manual.