Loading data files
If you have just captured some data, and you press Analyse button, Dewesoft will automatically load the recent data file. Otherwise (when starting Dewesoft or from the Setup screen), it will present you a selection window (file explorer) where you can select any data file to load:
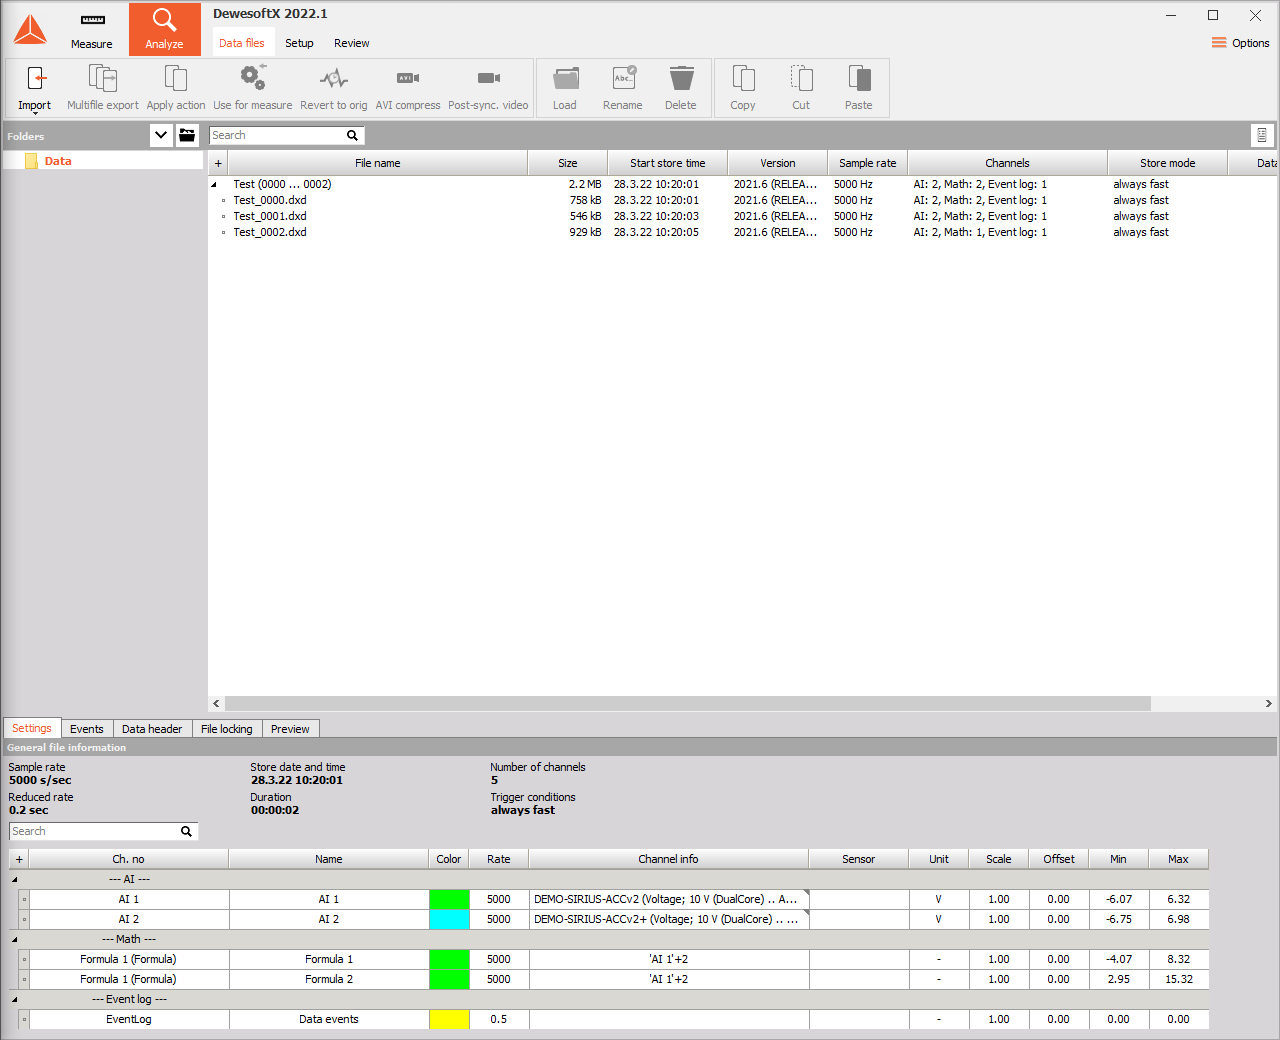
The window shown above offers subfolders of our main data folder, a lot of information in file list about the existing files and the currently selected file.
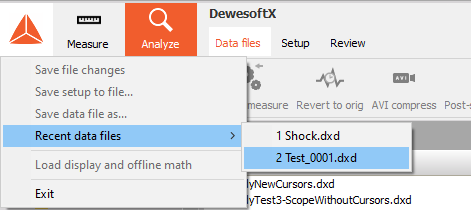
The user can also select between the recent opened files
Folders structure
The upper left section shows the folders structure. In this area, we can select where the data file should be loaded from. If we have subfolders, we can choose them by double-clicking on the subfolder.
The first level data folder can be changed by clicking on:
‘up’ button, which brings us one level higher in the folder structure:
‘folder’ button to browse for the new folder.
The default folder can be remembered by right-clicking on the folder list and selecting ‘Set by default’ choice.
File selection list
In the upper right section, you can select the file which should be loaded for analysis with double click on it. It provides you also with plenty of information about all files available in the selected folder:
- Name - Name of the file
- MultiFile Name - Name of the MultiFile
- Size - Size of the file in kB (= 1024 Bytes)
- Start store time - Date and time when the file has been modified
- Version - The version of Dewesoft used to acquire the data file.
- Sample rate - The used sampling rate; it will also show the reduced rate if the data was stored slow and fast on trigger.
- Channels - Number of active channels.
- Store mode - One of the four storage modes: always fast, always reduced, fast on trigger or always reduced and fast on trigger.
- Duration - Duration of storing.
- Data header - Contains variable entries made by user.
- Modified - File modification date.
- Custom fields - field refering on data header value, up to 10 custom fields available
- Video - Video type and file size (available only when a video has been recorded)

File Settings information
The bottom of the window displays the Settings, Events and Data header of the selected file. As a standard, Settings is selected.
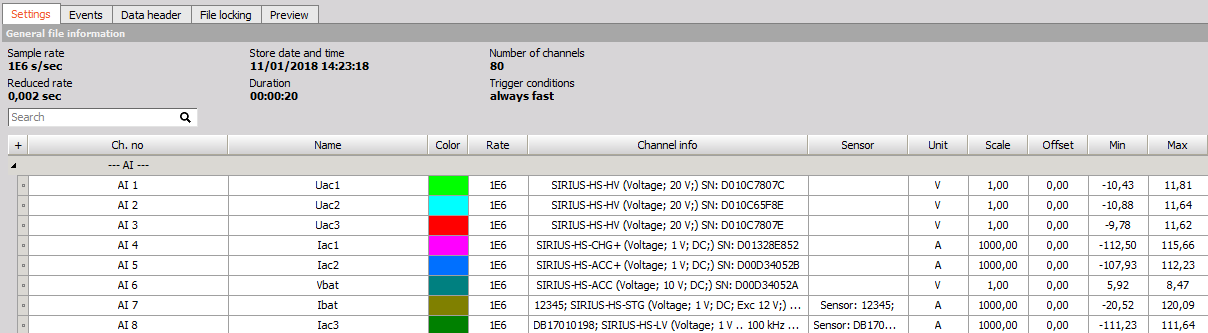
This part shows now information about the selected file on General file information section (Sample rate, Store date and time, Number of channels and Trigger condition) and more detailed information on Channel info section:
- Ch No. - Channel number
- Acq. rate - Acquisition rate will show the acquisition rate of each channel. This is important if sample rate divider is used or if the channel is asynchronous (CAN, GPS, PAD,…). In this case, it will show approximate sample rate (or keyword ASYNC with old file versions)
- Name - Channel name and color of the channel
- Settings - Type, input range and filter range of the amplifier. For newer amplifiers also the serial number is mentioned
- Scale (k) - Scaling factor k (y = kx + n)
- Offset (n) - Scaling offset n (y = kx + n)
- Range (from..to) - Scaled input range (min. to max. value)
- Min - Minimum value within the whole file for the channel
- Max - Maximum value within the whole file for the channel
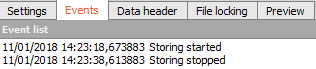
File Events information
When you change to Events, all happened events will be displayed. Events are start and stop of measurements, keyboard events, notice events and also voice events.
For information about enter Events for the measurement see -> Manually Start / Stop Recording.
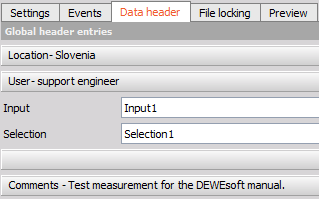
File Data header information
The Data header finally displays all the information you have entered in the data header window at the beginning (or the end) of a measurement. The exact content depends also on the fields you may have changed in the global header design.
Custom fields
In Analyze mode the Custom fields can be added refering to the Data header field as an input, 10 custom fields are available. You can choose colums with right click on the column bar.
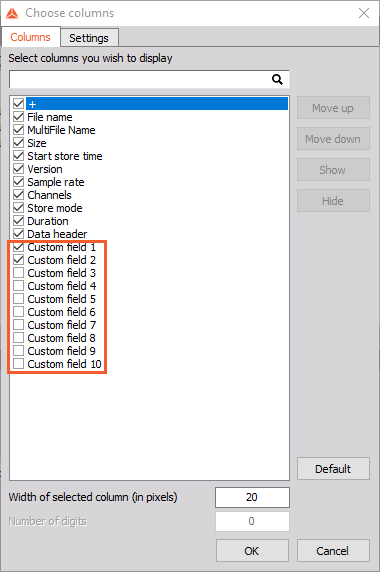
Right click on the Custom field colum and choosing the “Set custom data header field” with open tab where you enter field name.

Use exact “value” or name of field in data header like in example below.

You can now sort the files in orders of custom fields. In example below are datafiles sorted by user.

Loading a data file
Select any data file in the file list and double click on the entry to open the file in the preferred instrument or select the desired display, for example the recorder or the FFT.
All of the channel scaling, name, and units info that were in effect at the time of recording are restored so that your data can be properly interpreted, and the Recorder display screen will be shown.
For information about display data on screen see -> Displaying data and Replaying data.
To load any existing data file, you can also select Load Data File from the main Dewesoft Data menu (requires that you be in the Analyse mode).