Widget appearance
When you have to display dozen of channels in many elements - widgets, you must for clear appearance arrange all this with:
- Position elements
- Size elements
- define Transparency
Position
Make sure that your widget is still selected (simply click on it to select it, a white box around it will indicate the selection). Now you have two possibilities:
- Drag the widget and drop it where you need it
- Use the arrow keys to move it in the desired direction
HINT: use the SHIFT key simultaneously with the arrow keys to increase moving speed.
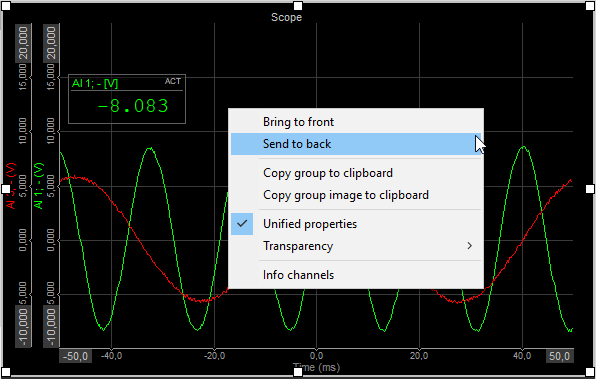
If the element comes in conflict with other elements, you can bring the element in front of the other one or behind it; therefore right-click on the element and then select Bring to front / Send to back from the appearing menu list.
The Design mode offers a help: when you have to arrange dozen of widgets, it is nearly impossible to line them up. Therefore the widget have a “magnetic” behavior. When you move one widget by mouse and come next to another widget, it will automatically snap to its outline.
Size
You can define the size of your widget completely free. Note that you have 8 handles around the recorder. We can adjust the size of the widget with dragging those handles. When the widget is selected, simply click on one of the six white boxes at the outline of the instrument (the cursor will change to double arrow - see picture below), keep the mouse button pressed and move the mouse into the desired direction.

If you select multiple widgets at once you can change the size of all selected widgets at once.
Transparency
Now we have defined the widget, its channel(s), size and its position. But what to do when widget overlap one another?
Dewesoft offers a transparency for each widget, which can be set to none, 25%, 50%, 75% or Full transparency. It can be set in two ways:
- use the Transparent checkbox in the Control properties bar and select the transparency value from the drop-down list
- right-click on the desired element, select Transparency and the desired value from the appearing menu:
![]()
After setting Transparency from this menu also Transparency field in Control properties is updated to this value:
![]()
For detailed information about Control properties -> see -> Common graph settings and Control properties.
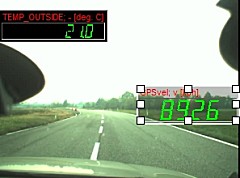
The following example should give you an impression of the function - the Digital meter transparency has been set to 75%: