Optris
The Optris module allows you to visualize, store and analyze the data acquired with Optris Thermovison cameras. Currently Dewesoft supplies XI400, PI400, and PI640 models however plugin works with other camera models as well. You can check supported cameras in the following article.
NOTE: The latest module available on the Download center does not yet support data reduction, emissivity adjustments in analyis and the frame rate might be slightly reduced.
NOTE: The Optris plugin supports connecting the cameras via USB only.
NOTE: The Optris plugin is compatible with WIN10 and WIN11 only due to the detection mechanism of the camera.
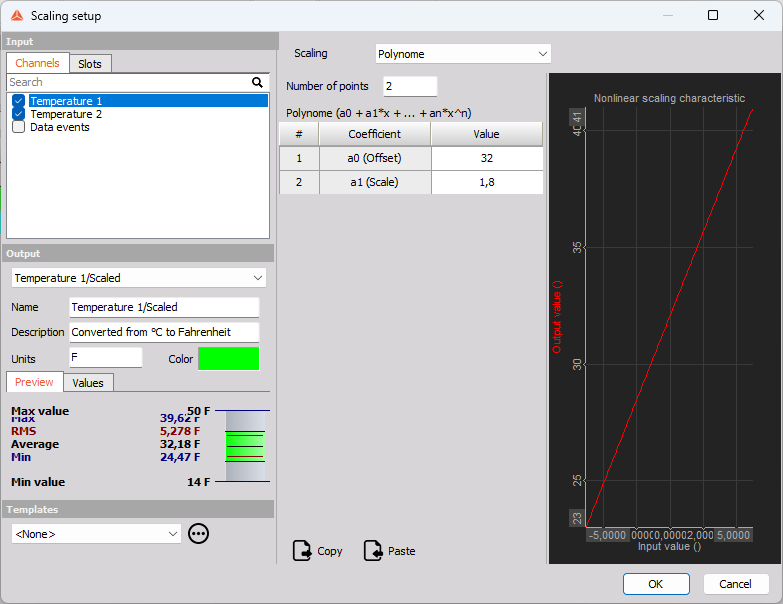
NOTE: The Optris plugin acquires data in raw data from PIX connect program. The raw data is in Celsuis units. Changing the temperature units in PIX connect, to Fahrenheits for example, will not affect the temperature units in DewesoftX. If you want to present the temperature as Fahrenheits in DewesoftX you will have to use Scaling math module in order to convert Celsius to Fahrenheits.
NOTE: The Optris plugin supports connecting up to 8 cameras.
Configuration
NOTE: Disable High DPI for DewesoftX before you start the setup file. Please follow the instructions on this link: Disabling High DPI for DewesoftX
Initial setup
In order to use the module, you need to have the Optris PIX Connect software installed on your PC and the thermal camera connected to an USB port. The camera can then be added as device using the plus button in settings.
NOTE: Before you start DewesoftX you should install the latest PIX connect program. You can download it from the link PIX connect
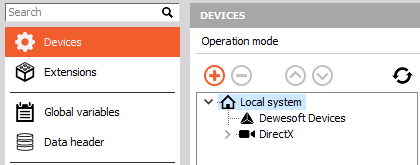
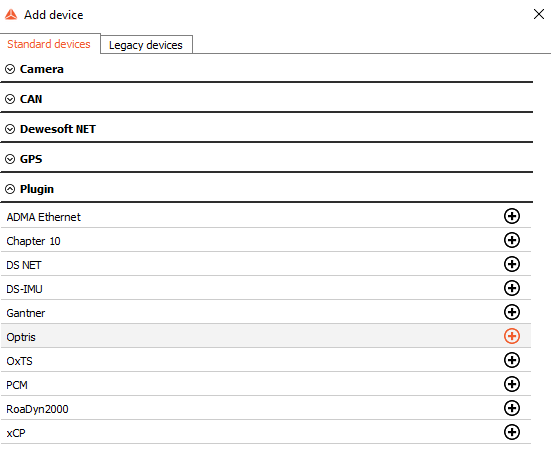
The Optris camera will be listed under the “Plugin” section. It can be added via the plus button.
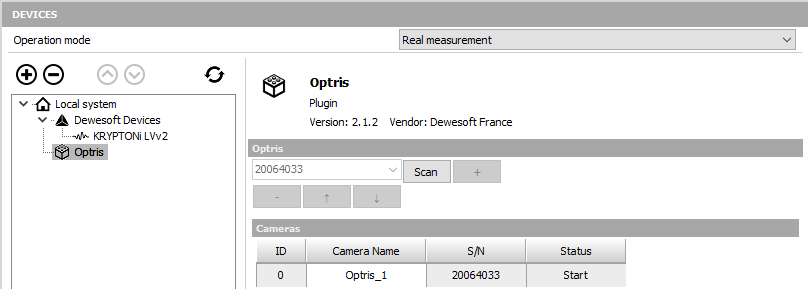
An Optris field will now become available in the device tree. Clicking on it will display a settings window on the right where you should press the “Scan” button, which will scan for a camera. Then you can add the recognised camera by clicking the “+” button. A new line will appear in the list with the camera that you have just added. You can then rename the camera.
NOTE: Using multiple cameras at a time is supported from plugin v2.0.9 onward. The recent plugin is tested with 4 cameras.
In the now open Optris PIX software you should select the “Configuration” option under the “Tools” tab, as shown on the picture below.
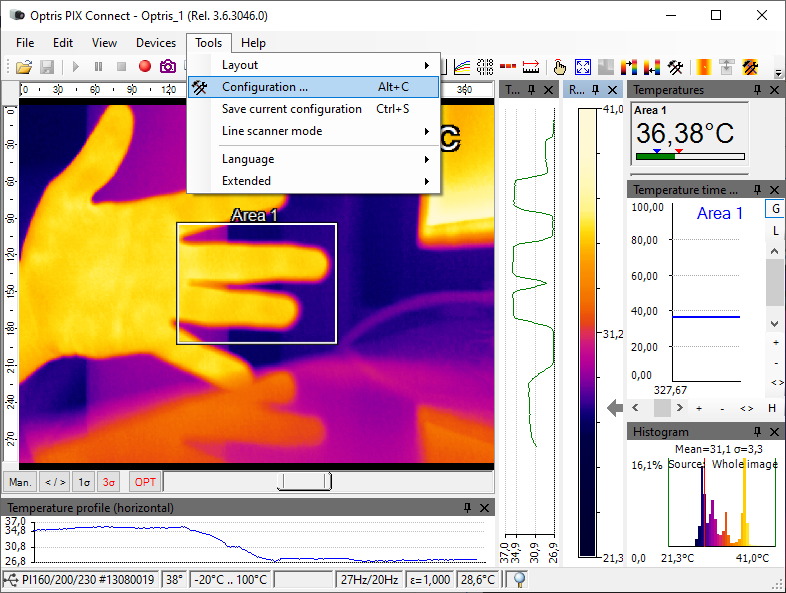
In the configuration window you can control the video resolution and framerate settings as well as the temperature range under the “Device” tab.

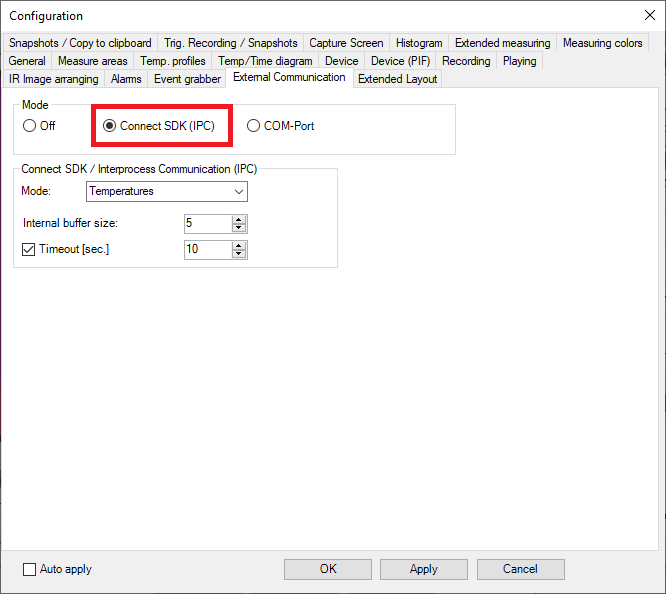
Under the “External communication” tab you need to select the “Connect SDK (IPC)” option and then save the selection by clicking on the Apply button.
The camera should now be configured to work with Dewesoft, so you can click on the “Hide Setup” button and exit out of Dewesoft’s settings window. In the channel setup you will now have an Optris tab, where several parameters related to the opearion of the camera will be listed. If all of the colored cells will be green, then the camera is correctly loaded and ready for use. Otherwise, please consut the troubleshooting section.

To visualise the data acquired with the camera, click on the Measure tab and add a 3D Graph widget via the + button. You can scale the min/max by left-clicking on the colored bar on the left side.
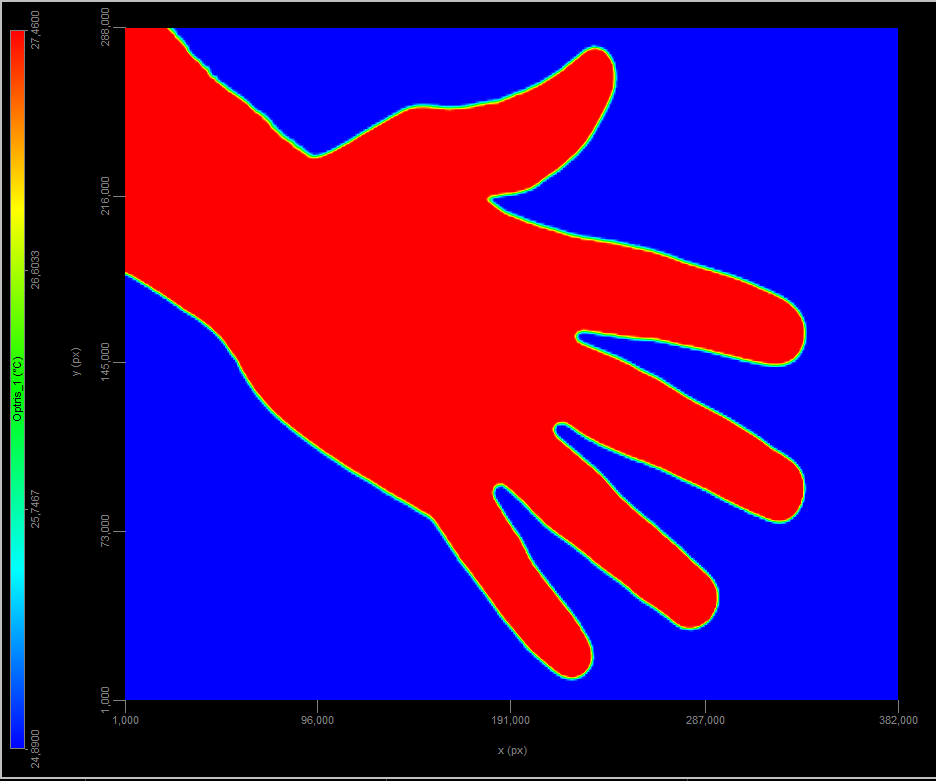
NOTE: To learn more about 3D graph widget visit 3D graph
Registration, licensing
If you already have a Optris camera and did not purchase it from Dewesoft, then you will need to register the license key. Please make sure that the camera is connected and detected by the module before registering the license using the right arrow key. To verify this, check if you can see an “Optris (1 key)” tag marked in the image below. Once the license has been registered, it will be activated as long as the linked Optris camera is present in the system.

Opening flag, closing flag
In the datafile you will detect the Opening flag and Closing flag as an event in the DXD file. The picture below shows the events in the datafile. When the flag occurs, two events are displayed in Dewesoft, so between the two events (opening and closing flag) the image is freezed.

The clicking sound that you can hear is a “flag”, an auto-calibration of the camera. The auto-calibration phase is done internally by Pix Connect, and prevents derivation of the measure. It consists of a small metal piece of metal with regulated temperature that goes in front of the sensor for about one second to maintain precision of the temperature. It serves as a reference to align temperatures.
Troubleshooting
Video preview is not available, mouse cursor is blinking
When Pix Connect crashes and the user starts Dewesoft the video can not be viewed in Dewesoft. This is because there is a Pix Connect process running in the background. Optris plugin tries to continuously restart the background process of Pix Connect, but the command fails every time -> This can be identified by mouse cursor blinking. The solution is to kill every running instances of Pix Connect in task manager.
Error message about PIX connect is not up to date
Visit Optris download center for PIX connect, download the latest version availble and update. Then restart DewesoftX.