Alarms
In Dewesoft, you can set alarms that will provide an output depending on the state of acquired data, i.e. the conditions that you have set.
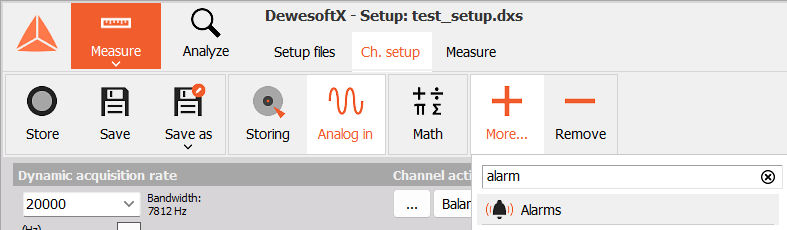
Setting alarms is done via their module. You can add it in the Ch. Setup tab by clicking the + More… button.
When the module loads, you will see a dropdown list in the upper right corner of the screen from which you can pick between two user interfaces. The setup configuration will stay the same when you switch between interfaces.
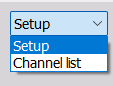
- Setup - This is the classic, default user interface. You will see it when the module loads.
- Channel list - This is the new user interface in which you can quickly configure one or multiple channels at once, i.e. perform bulk actions, and import or export the setup configuration.
Setup
The Setup interface is divided into two tabs: * Alarms * Channel limits
Alarms
Add/Remove Alarms
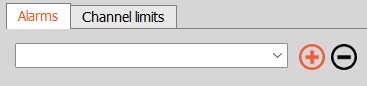
Use the + and - buttons to add and remove alarms, respectively. To change an alarm’s name, click on it, type the new name in, and press Enter or click elsewhere.
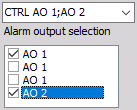
Alarm output selection
By default, alarms are virtual - visible in the status toolbar. If you want the alarm to be output to a channel as well, mark the checkbox next to it. You can select none, one, or multiple output channels.
Use Alarms When
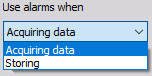
Alarms can be used either during acquisition or storing which you can select from the dropdown menu:
Add Event on Alarm
You can choose to automatically generate an event when an alarm is turned on by selecting this checkbox.

The event(s) will be listed in the event list in the upper right corner. For more information on working with events, please follow the provided link.
You can also use the Tabular values widget to display alarm events.
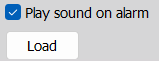
Play Sound on Alarm
After checking this option, you can press the Load button and choose the sound that you want to play. Afterwards, you can press the Play button that will appear to test it.
Alarm Reset Settings
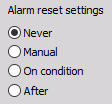
You can choose how (if at all) the alarm will be turned off after turning on:
- Never - the alarm will only turn off after acquisition or storing is done
- Manual - click on the Alarm on status in the upper right corner to turn it off


- On condition - define one or more conditions upon which the alarm will turn off
- After - the alarm will turn off after a certain amount of time (in seconds)
Conditions Setup
NOTE: Alarms have no influence on recording triggers. They are only used to define the state of digital output channels.
There are three types of alarm conditions: * Start - the alarm will turn on * Don’t start - the alarm will remain turned off (appears after adding a Start condition) * Stop - the alarm will turn off after being turned on (appears after selecting On condition alarm reset)
Add or remove condition by pressing the + or - buttons. To modify a condition, press its Setup button.
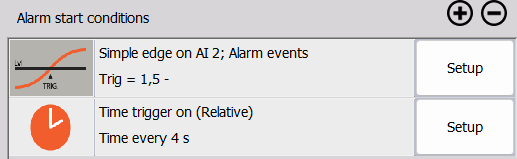
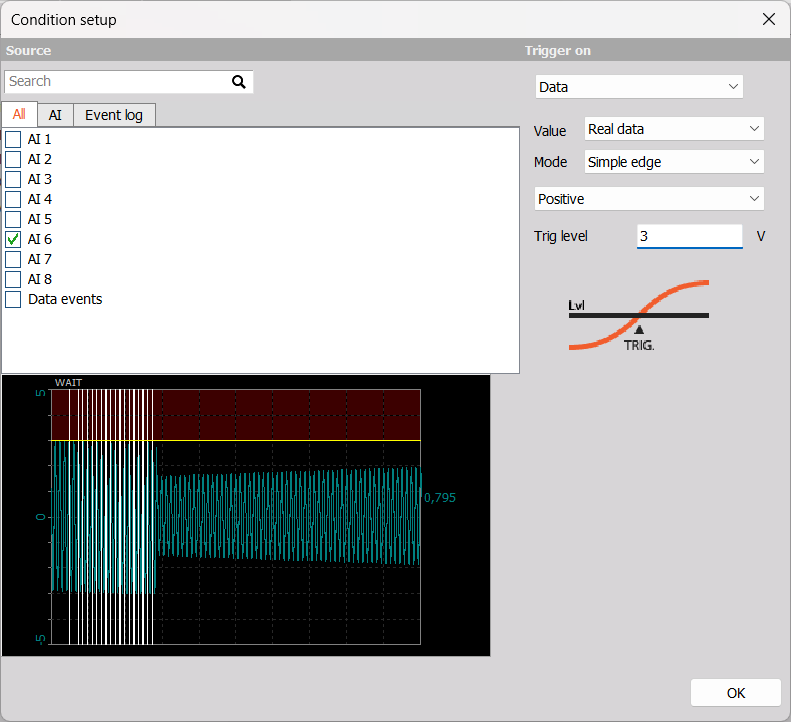
After choosing an input channel from the list on the left side, you can see its current readout below it. On the right side, choose a trigger type and modify what the alarm will trigger on. If you wish to select multiple condition sources, click and drag down the list or hold CTRL and click on the sources you want to select.
Alarm conditions are similar to trigger conditions. For more information on triggers, please refer to Trigger Condition Setup and Triggered Storing.
NOTE: The alarm monitoring function has no influence on recording functions. It is only used to define the state of digital output channels.
If you have more than one alarm condition defined, they will be combined by an OR operator. There is no relation between output channels - therefore, you can use the same or different conditions for different output channels.
Channel Limits
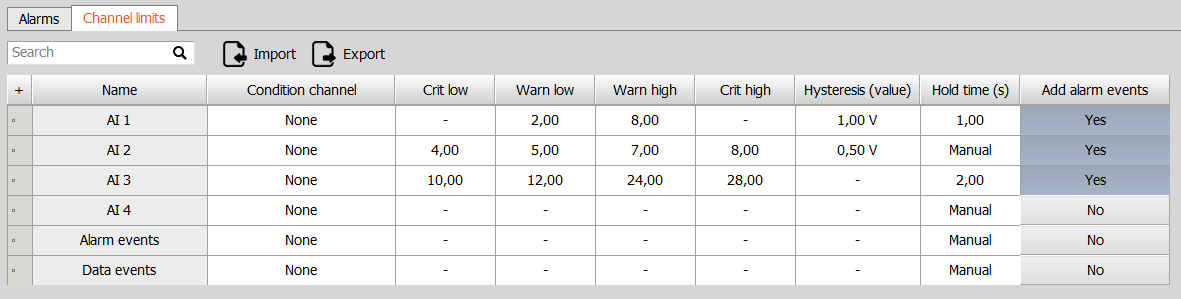
This tab is the same for both interfaces. You can set min./max. Warnings and/or critical limits for each channel, as well as hysteresis and hold time. You can also choose if an alarm event will be added to the event list if one of the thresholds is crossed.
For more information, please consult the Channel limits section of the manual.
You can also search for channels by name and import/export your configuration as an .xml file.
Channel list
The Channel list interface offers the same possibilities as Setup, but with alarms and conditions displayed in compact tables. This means that manipulating multiple alarms is easier and quicker.
NOTE: This user interface is available in DewesoftX version 2026.2 onwards. Please visit our Downloads page for the latest version of DewesoftX.
Alarms

You can add/remove alarms by using the + and - buttons or modify existing ones by simply clicking on the category you wish to change. You can also set if alarms are to be used when acquiring data or storing.
Import/export your configuration as an .xml file. When you are importing a configuration, existing alarms and their conditions (if any) will not be deleted. If an already existing alarm and an alarm in the configuration you are importing have the same name, DewesoftX will keep the already existing alarm.
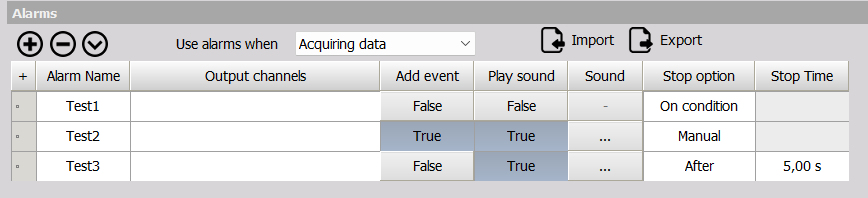
Alarms are sorted by time of creation and the settings in the table are ordered in the following way:
- Alarm Name - double click to edit
- Output channel - assign a physical output to the alarm
- Add event - the alarm will be added to the event list
- Play sound - hear a sound when the alarm is triggered
- Sound - load a sound, play the loaded sound, load a new sound
- Stop option - choose if the alarm will reset and in which way
- Stop time - if the alarm should turn off after a certain time, set it here
Double click Add event or Play sound to quickly reverse these settings for all alarms, i.e. True becomes False and vice versa.
Click on any column’s name to select all alarms. Use the Shift key and Up/down arrows to select only some alarms.
Conditions

Conditions are ordered by the alarm they are a part of. Above the table, you can:
- Search - whole words or partial, capitalization is not important
- Filter - choose a category and a value/option
- Add/Remove conditions using the + and - buttons
- Show groups - each alarm will have its own conditions group
- Show settings - the settings for Data, Trigger, and/or FFT trigger types will be shown directly in the table

The settings in this table are ordered in the following way:
- Input channels - click to assign more channels or remove already assigned ones
- Alarm - assign or reassign the condition to an alarm
- Output channels - to edit, go to the Alarms section above this one
- Condition type - Start, Don’t start, Stop
- Condition description - sums up alarm trigger settings
- Trigger on type - choose the trigger type
- Setup - opens the Condition setup window
If you delete an alarm, you will be asked if you want to delete its conditions as well. If you keep the conditions, you will be warned they are now unassigned, but this will not prevent storing.
Channel Limits
The Channel limits tab is identical for both interfaces.