Channel limits
To monitor channel values you can define the channels limits that should not be crossed. DewesoftX also supports dynamic limits, which means that you can monitor different limits for the same channels, depending on the value of the assigned conditional channel.
The channel limits can be either defined directly from Channel Grid in Analog in or Channels module, or directly in Alarm module under Channel limits tab.
Channel limits options
Available options for channel limits
- Critical low
- Critical high
- Warning low
- Warning high
- Condition channel
- Hold time [s]
- Alarm event [y/n]
- Import
- Export
Channel Limits and Condition channel
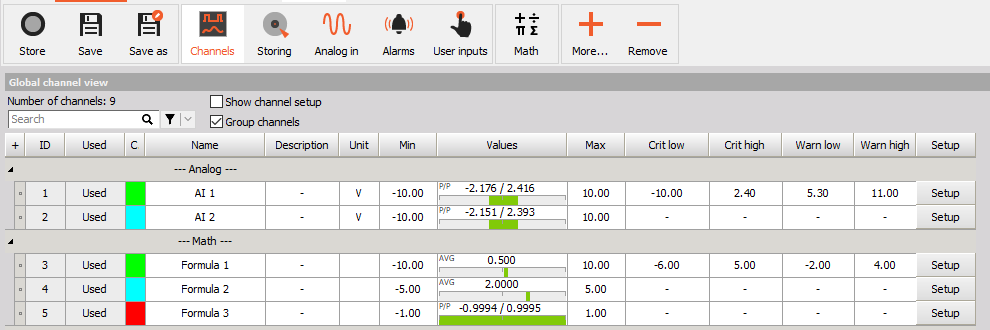
Four different channel limits can be simply deffined for each channel - Critical low, Critical high, Warning low and Warning high in Channels or Analog in module.
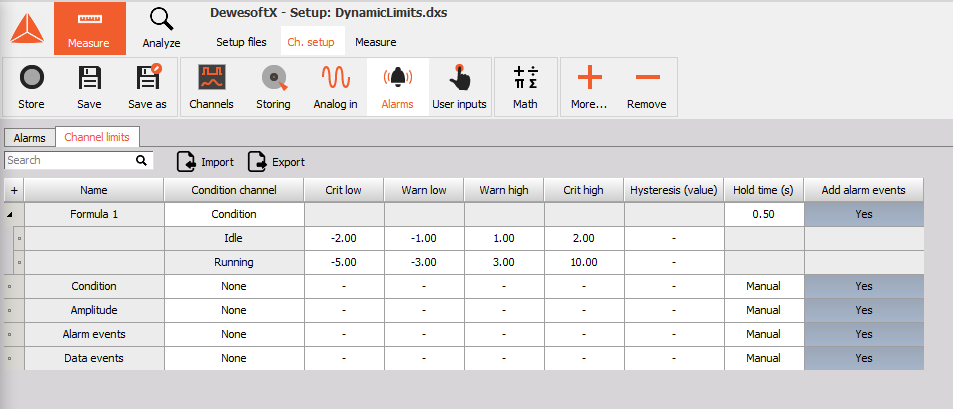
A condition, based on a discrete channel can be additionally added to any channel. The condition channel can be added to your Channel Limits only in Alarm module. When you select a condition channel, as many rows as defined discrete channel values are added with according name. Each condition is also appended with its defined name. All four possible limits are then available for each condition.
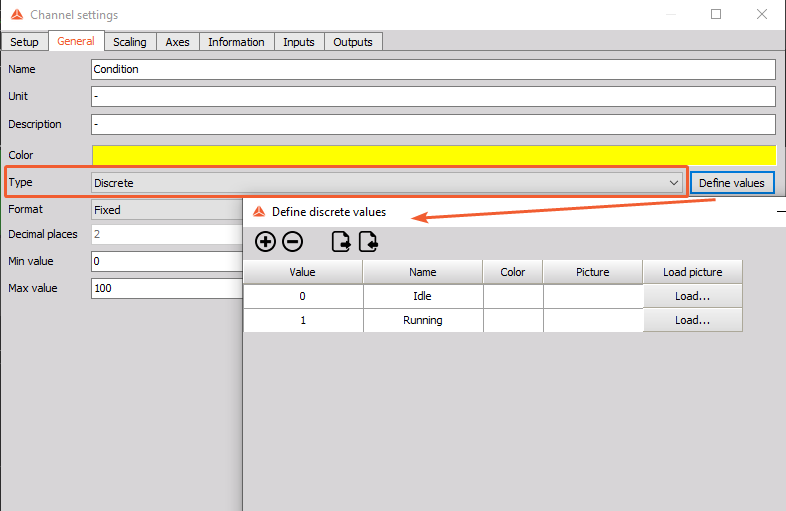
Discrete values can be assigned to channel via channel settings or throughout discrete display widget.
NOTE: A condition channel can be easily made using a Math formula and an If statement for the desired condition based on the value of the analog channel. As an example “if(“RPM”>700,1,0)
When the Dynamic channel limits are used they will be presented in the ractangular brackets in other modules ( Analog In, Channels, etc). Dynamic limits can not be eddited in those modules.

Hold time, Hysteresis and Alarm event
Hold time in [s], will hold the warning/critical status for an X amount of seconds after the channel falls below the limit. By default, the Hold time is set to Manual. Manual option will hold until a manual reset for the warning/critical status (orange/red color stays even after the event on the digital meter, holdtime 0 never resets until manual user reset).

The warning/critical status can be reseted individually for each channel or for all channels at the same time.
To reset the warning for each channel individually click on the channel with the right mouse button and select Reset OVL.
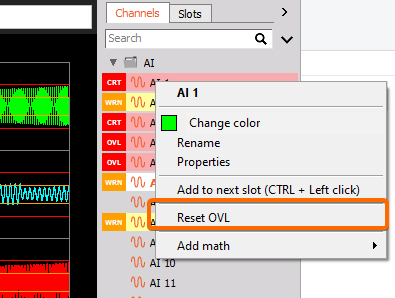
To reset the warnings for all channels at the same time, right click on the OVL warning at the top of the screen and select Reset OVL.
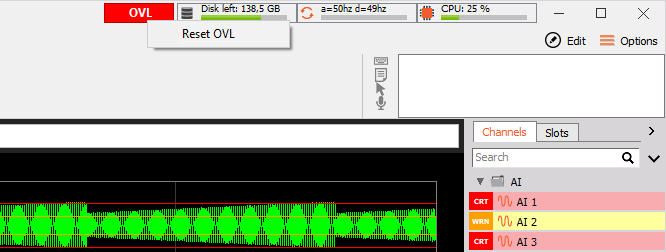
The option Hysteresis (Value) will hold the warning/critical status if the channel value falls below the defined limit for less then defined in Hysteresis column.
An Alarm event can be added on the channel limits, meaning that an alarm message will be added to the “Alarm events” channel, an violet cursor will be drawn on the recorder widget and a message will be seen in right top corner of software.
Import and Export option in Alarm module
In the Alarm module there is an option to export and import the *.xml file with the channel limit values. The file can be modified in a 3rd party tool (such as Excel) and later imported back to DS-Grid in Alarm module.

Channel limit presentation in Measure mode
Channel limits can be presented on different widgets when in Measure mode.
Overload indicator and Tabular values display
Channel limit status can be displayed with the Overload indicator or in tabular values display, when assigning Alarm events to the channel.
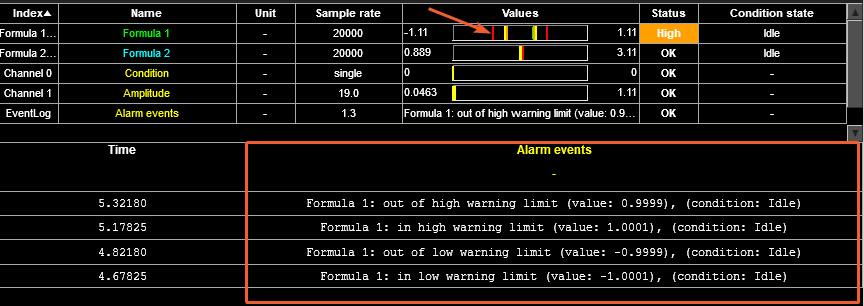
Digital meter
The limits can also be displayed on Digital meter widget. For that, you need to enable the option Limit type to Alarm. When the signal value crosses warning limit, the color of the channel turns to orange and when the channel value reaches critial level, the color turns to red.
The color of warning (orange) or critical (red) level will also be shown on the digital meter until the reset of the warning. When dynamic channel limits are enabled, the condition of the channel will appear in the top right corner of the Digital meter widget.
In analysis mode, the text color will be the same throughout the data file, depending on which channel limit was exceeded. If only the warning limit has been exceeded, the text color will be orange. If the critical limit has been exceeded, the text color will be red.

Recorder widget
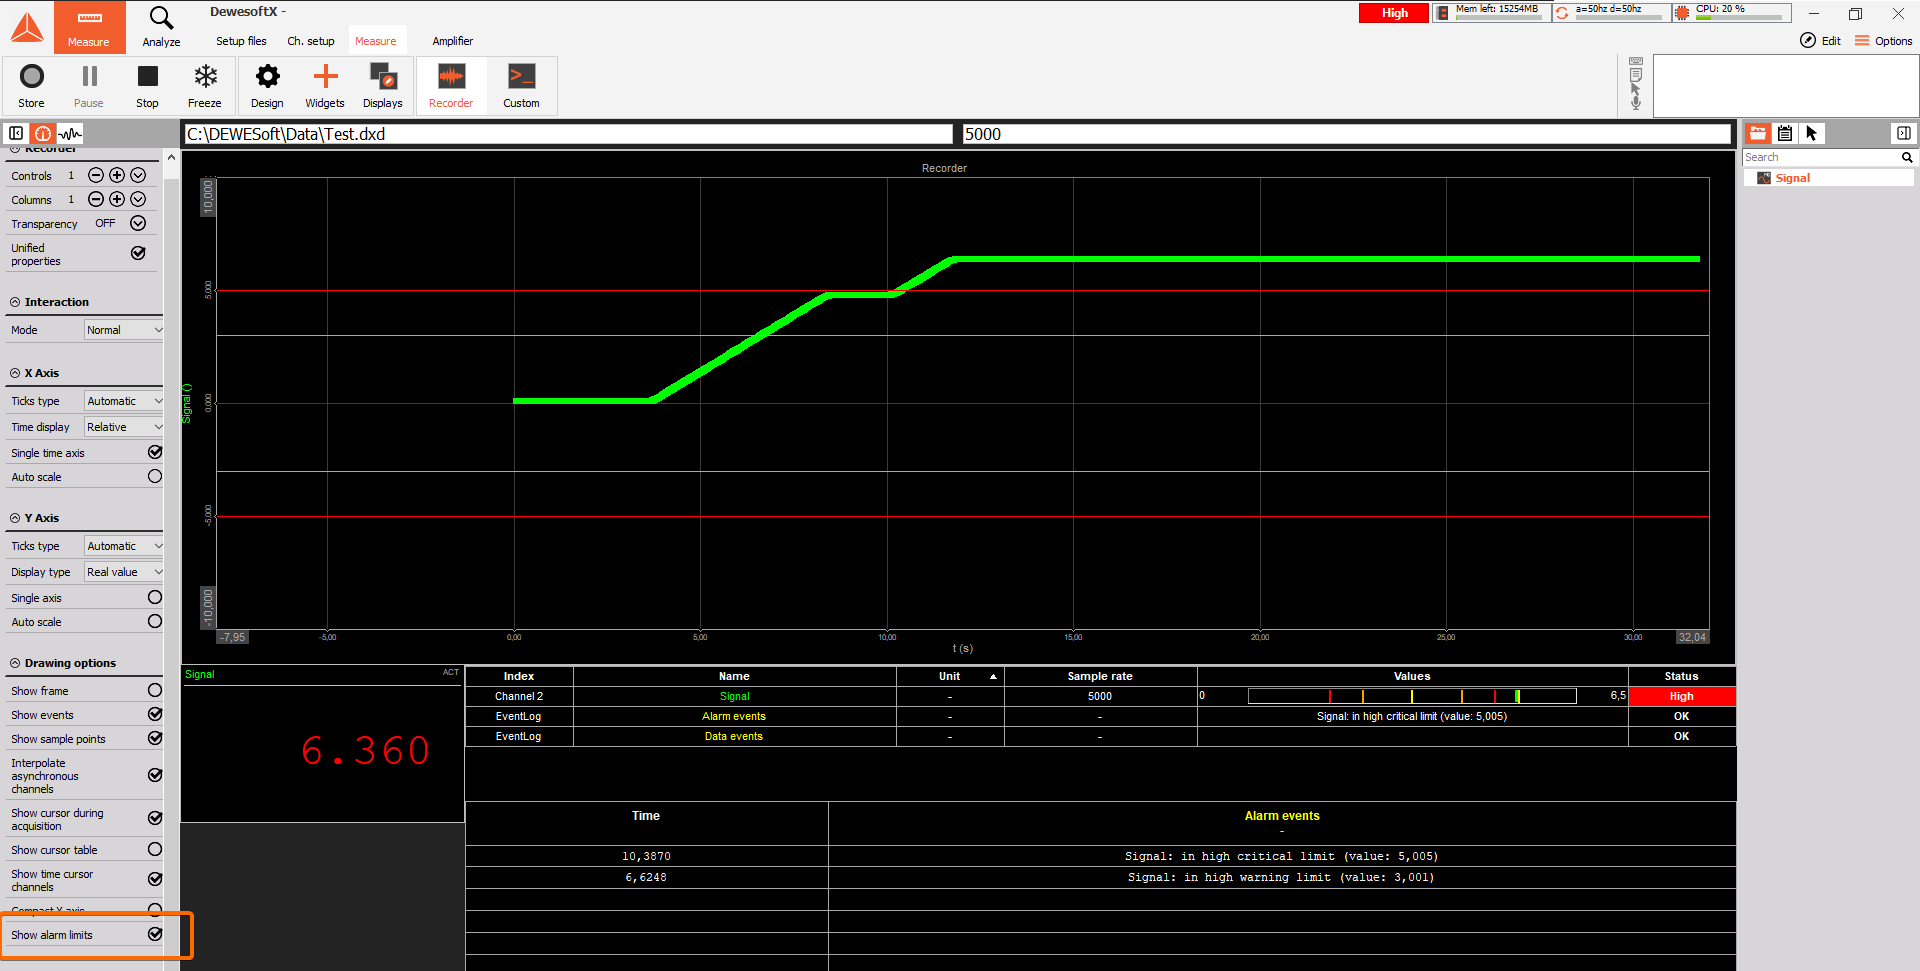
The warning and critical channel limits can also be shown in the Recorder widget. The warning and critical channel limits are visible as horizontal lines. Warning limit is orange line and critical limits is represented by a red line.
The channel limints can be enabled by checking “Show alarm limits” property in Recorder Drawing options.
When using dynamic channel limits (multiple limits per channel depending on state), all limits will be displayed on the recorder. An additional character L appears on the left edge of the recorder. When you move the mouse cursor over this character, a notification appears with information about the condition to which this limit belongs.
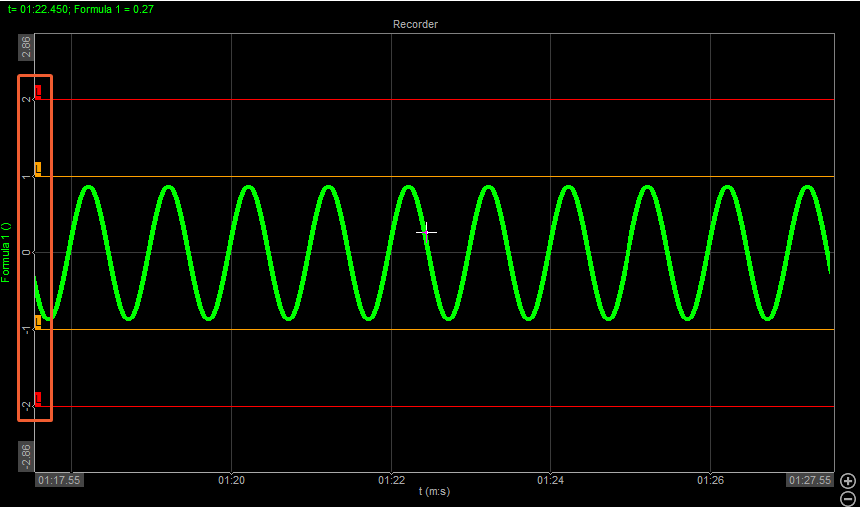
In Analysis the limits presented on Recorder widget will jump from one state to antoher, when the condition channel value will be changed.
Event list
During storing mode, the alarm events are seen in the event list in the top right corner of measurement screen.
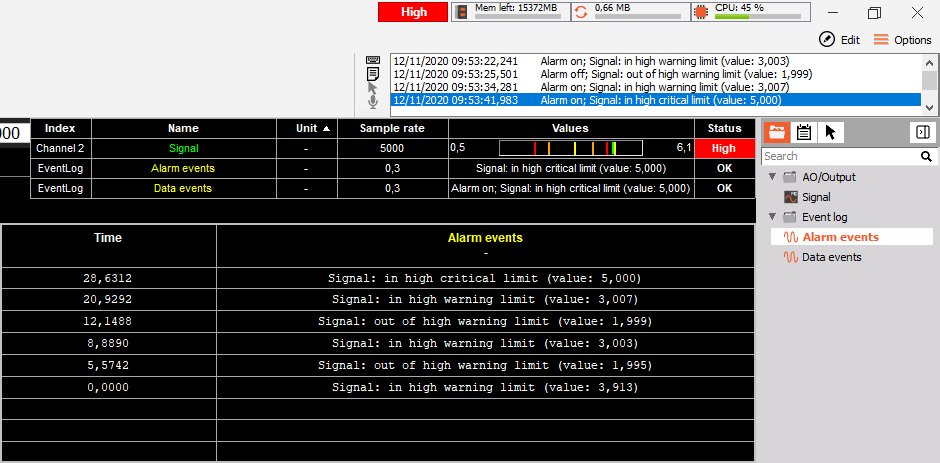
Status button and channel list
When the Channel limits are exceeded the Alarm status color is changed. In Channel list the channel which exceeded the defined channel limits will also change the color to either orange or red, depending on which limit was exceeded.