Channel setup
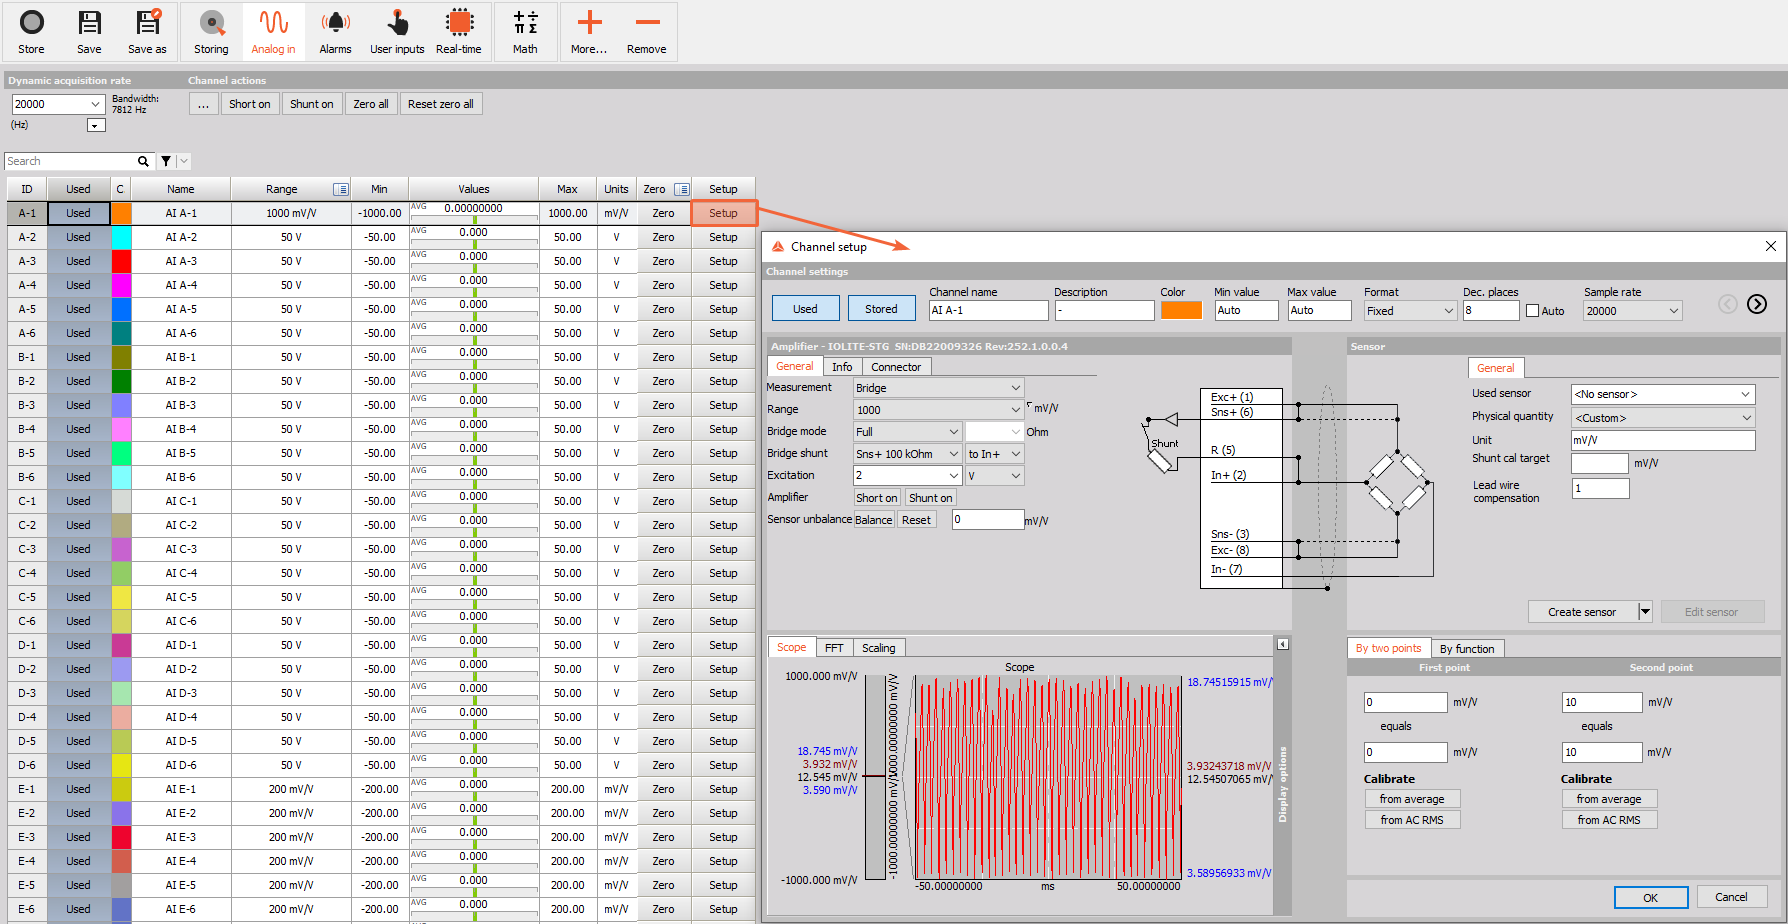
To set up ot calibrate any input, just click the Setup button on SETUP column for that input, e.g. for set channel 1 press Setup button in the last column.This setup window will appear:

The channel setup window is divided into next segments:
- General channel settings - you can enter the Channel name, Description, Color, display range - Min value, Max value, format, and Sample rate divider
- Amplifier settings - define and set amplifier settings: Non-programmable, series and special programmable modules
- Sensor settings - define and set sensors information and data in the sensor database
- Scaling - perform scaling and manual or automated calibration; set a dynamic representation of your signal
- Calibrate - The ability to quickly calibrate directly to DC and AC signal sources is a great advantage of Dewesoft
- Live data preview - Real time display of the acquired signal.
After all settings are done we must confirm all changes with selecting OK bottom or discard changes with Cancel button and return to Analog input channel Setup screen.
Example: Principle module connection
A voltage up to ±400 V (= signal source) will be measured with cables (=’sensor’) connected to a high voltage module (=amplifier).
