Digital Meter 
The digital meter widget shows the current or averaged value of the assigned channel. For detailed information about assigning / reassigning channels to/from the digital meter, see Display settings.
Control properties can be found to the left and to the left and right of the display. For detailed information about control properties: grouping, number of columns, add/remove widgets, transparency,… see Control properties.
Digital Meter Settings
Typical digital meter settings are:
- Value type
- Display type —> Graph settings
- Average time —> Graph settings
- Upper / Lower limit —> Graph settings
- Drawing options
- Font
- Resolution
Appearance on Screen
The digital meter is rectangular widget. The assigned channel name and unit are in the top left corner, and the display type is in the upper right corner. The channel value in the main space of the digital meter. Some appearance settings can be changed under drawing options and font settings.
For detailed information about widget positioning, size and transparency, see Screen Editing.
Displayed Value
The digital meter can display the value of the assigned channel or time information, either absolute or elapsed.
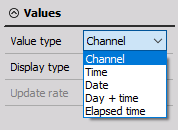
- Channel - current measurement value, assigned to an acquisition channel
- Time - current time of the acquisition system
- Date - current date of the acquisition system
- Day + time - number of the day within the current year and time of the acquisition system; this format is compatible with timing information according to UTC
- Elapsed time - time elapsed since starting the measurement
If you select Channel, some additional options are available.
You can either present the current value or you an average of the value, in which case you can set the update rate for the calculation of average values.
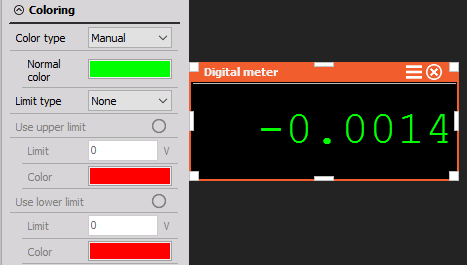
Coloring Options
The color of the channel value can be selected manually or it can be the same as the color of the assigned channel.
Additionally, you can also color the display channel values depending on the channel limits. Channel limits can be defined manually (Limit type Manual) or they can be linked to the software defined channel limits or alarms (Limit type Alarm).
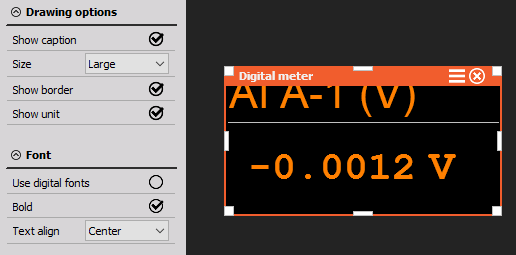
Drawing Options and Font
You can customize the Digital meter’s appearance. We offer the following options:
- Show caption - show channel caption with unit and Display type. This is enabled by default, but it can be manually disabled
- Caption size - adjust the size of the caption if shown
- Show border - a white border is added by default, but it can be manually disabled
- Show unit - add units to the displayed value
Additionally, you can adjust the font: * Use digital fonts - when this option is enabled, some other options are disabled (Show unit, Bold text and Text align) * Bold - the default font can be set to Bold * Text alignment - left, right or center alignment
Resolution
You can either set the resolution to automatic - you will have as many digits as the resolution of the assigned channel or you can manually add or remove digits by pressing the plus or minus button. If you disable automatic resolution, you can define the number of leading and trailing digits.